Pond progress
After almost a week of delays due to weather, the holiday, and other projects that I was involved with inside the house, I finally was able to work on the pond again yesterday. You may remember from the last pond post that I finished up in the near darkness by creating the pebbled beach, but was unable to take a photo of it. Here's what it looked like yesterday morning, which is exactly how it looked that evening of the previous post:

I started with the beach because it was the one area of which I had a well-formed idea -- the rest of the edge would have to be designed later. Well, later is here, so let's get started!
The first thing I did was go buy some flagstone:

I knew that I needed to create a walkway at the right edge of the pond that would allow me to get into the back part of the yard, and flagstone would be perfect for that. It's the same type of stone that I used on my patio and next to the house (back in 2006 when I built the patio), and it's quite close in appearance to the stones I've been using from my chimney rebuild -- in other words, it's perfect for this project!
So after carting the flagstones down near the pond, and hauling the remainder of the chimney stones from the front yard, I surveyed the area while resting:

There is a potted bamboo at the right side of that photo -- that's where I plant to build a small deck next year. Because of this the path must go right next to the pond, and that helps me figure out how to edge this section.
First though...

It's finally time to get rid of the extra liner! It's really been making it difficult to envision everything, and I'm glad to trim it at last:

After cutting it, I buried the edge:

Unfortunately the tree shadow fell exactly on the liner edge -- I hope it's clear enough though. I then turned my attention to where the path will go:


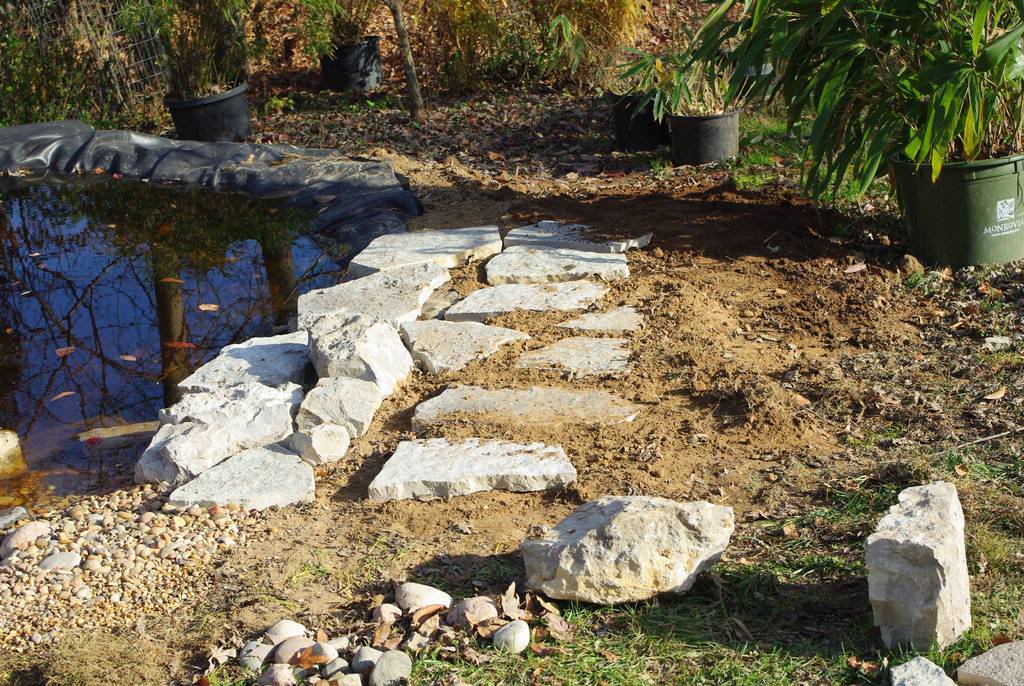
And I started laying out possible stone combinations:

It always takes me a while to find a pleasing pattern of steppers when creating a path, and this time was no exception. (Is this difficult, or do I just have high standards?) You can see that I've also added more rocks along the water's edge here.
Once the steppers looked good and were buried and level, I added loose soil to pack between them:

I'll be planting something in these cracks -- at least that's the plan right now. They may just end up being hard to maintain and weedy, but we'll see how it goes. I extended the pavers right to the water's edge:

Sometime between burying the liner and adding these stepping stones I finished the beach too:

Remember that my goal is to create as natural a look as possible, so I ensured I had pebbles of all sizes:

I'm quite happy with the way the beach turned out!
Here's an example that shows how important it is to add all different sizes of pebbles. First, just the medium stones (sold by the bag at Home Depot as "Calico" stone in case you're wondering):

Not bad, but it looks too artificial to me. So what does adding some "Pea Pebbles" do?

I don't know about you, but to me that looks so much more natural, and better. The smaller pebbles fill in the empty spaces too, helping to lock things together.
Okay, so the right side (with the path) isn't quite finished, but it's getting there.

Time to work on the left side a bit. I pretty much just found chimney rocks that I thought looked good, and started experimenting with placement until I liked the results. Again, going for a natural look.


There are a lot of gaps over here, as this is the side for plants. I'm thinking that there will be several grasses over here, so the rocks won't be completely visible. (Pretty much everywhere you see bare soil right now will be planted.) The gaps also seem like they'd be more attractive to some wildlife -- although that's just a feeling.

I also started experimenting with the rear edge:

I'm not really happy with this part so far, but it's a start.
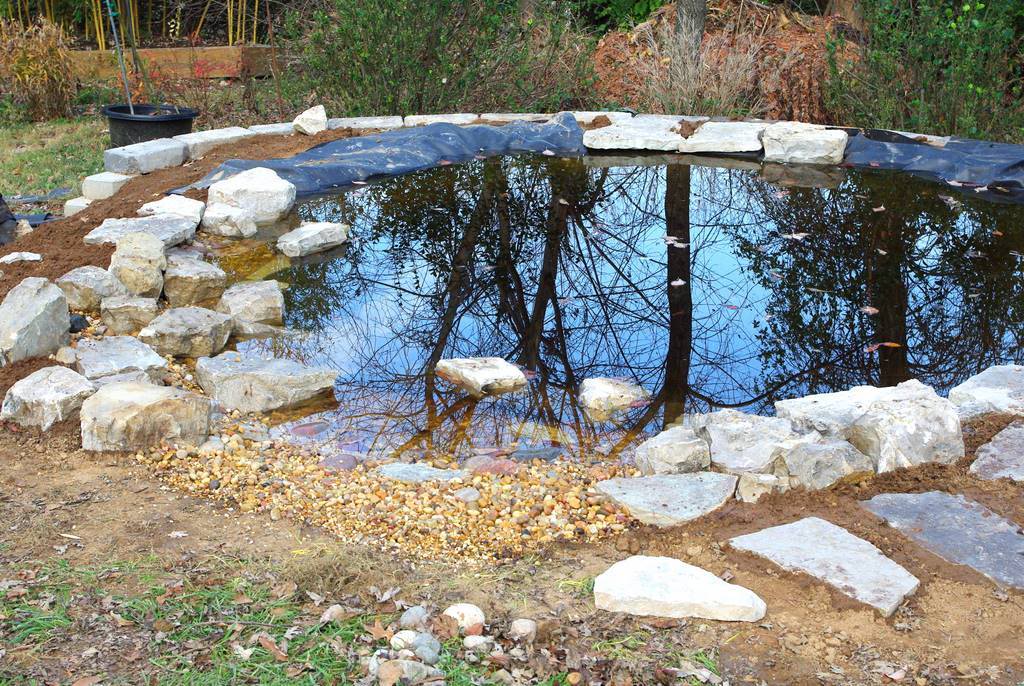
That's about as far as I got yesterday, so let's step back and take a look:


It should be quite nice one all of the plants go in next year, but I couldn't resist planting a few as tests now:

A couple of sweet violets (Viola odorata) will be a test to see if deer and/or rabbits like eating these more than the common lawn weed violets we have here. I hope not.
I envision a lot of sedges in various places:
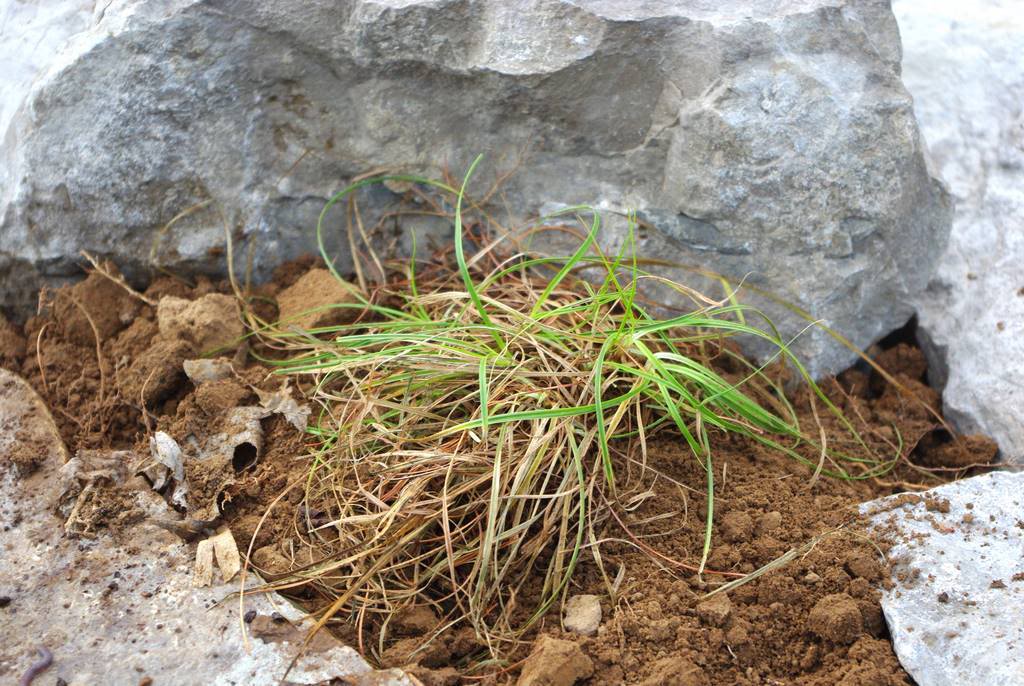
This 'Beatlemania' sedge is one of my favorites, and I think it will look really good here. I don't know if these will survive the winter here as it's quite late to be planting, but we'll see. If not, there's plenty more where this one came from. It's amazing how much difference just a little bit of vegetation makes next to these rocks!
I'm even more excited now, as I've got some momentum and the end of construction is in sight.
It's starting to look like a pond, isn't it?
.


Looking really good. I can just imagine with some tall grasses between the stones to break up and hide some of the edges. A satisfying project. Did I see a little fish laying eggs in the gravel!
An amazing transformation. Initially, I was worried about it looking artificial, but not any longer. It will be a new focal point in your garden!
Oh WOW!!! it's looking great, I can just picture it with sedge and grasses ... Going to be a-mazing!!!! I love the beach, the pebbles, the path. You have / are creating something really special here.
Who knew that a cracked chimmey = a new pond. Isn't it great? Nice beach.
It looks fantastic! I can imagine it with plantings both in and around the water... It's going to be so much fun for you to experiment with aquatic plants. Can't wait to watch the transformation!
I like the instant reflection you get with the water element. Check out mazus reptans with white or purple flowers for in between the pathway!Here's a random link to see its great features:
http://www.bluestoneperennials.com/MARE.html