Final pond update
This past weekend I finally finished building the pond -- if "building" is the right word. "Finished" is probably not the right word either, since this project -- like most parts of the garden -- will constantly be evolving, changing, and maturing. The bulk of the work is done though...
Ask me which is better: working with stones and water when it's 65ºF (18ºC) and sunny, or 35ºF (2ºC) and windy and drizzling and muddy. Actually, it's a tough call, since the colder one was the day I finished, which made the day much more pleasant despite the conditions.
I won't go step-by-step on any of this, as it was really just a matter of finding different combinations of rocks that looked as natural as possible. I did the left and back sections first:

It was difficult to make it look completely natural, but I added some partially submerged rocks to help with that illusion.
It will look a lot better when it's all planted in the spring too, as there is a lot of planting space on this side:

With those sections finished, only the right back "corner" remained:
I did need to pick up a bit more flagstone, and a couple of pieces of "edging" stones.
Did I mention that in the last update already? It's all a blur now. Good thing I have these posts to refer back to once my memory goes completely.
Here you can see several components of what I was dealing with on the second day of the weekend, after rain Saturday night:
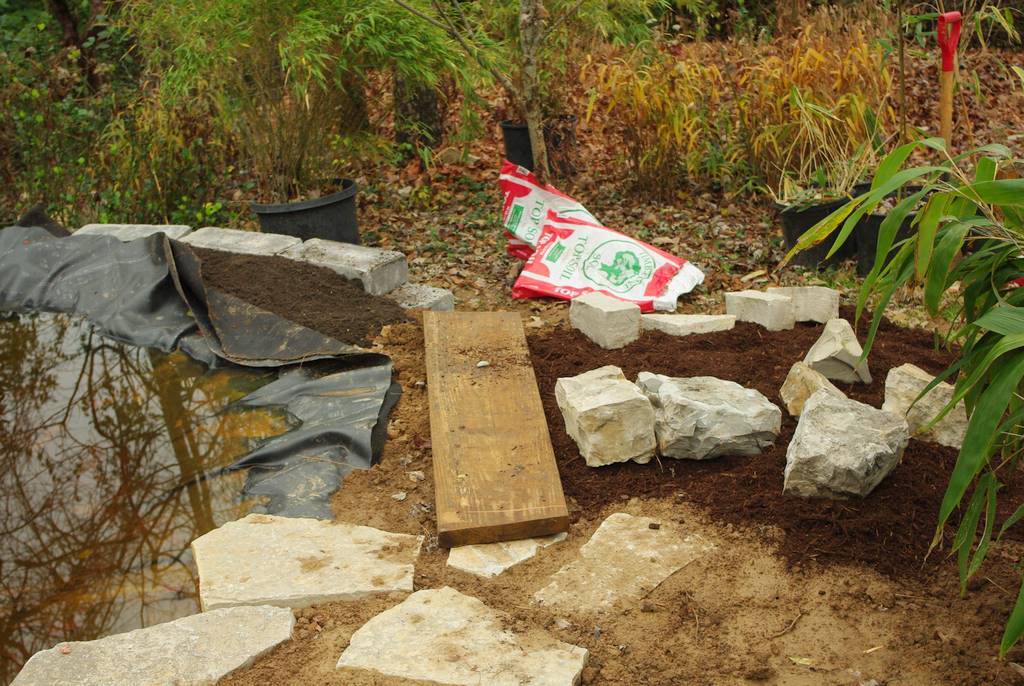
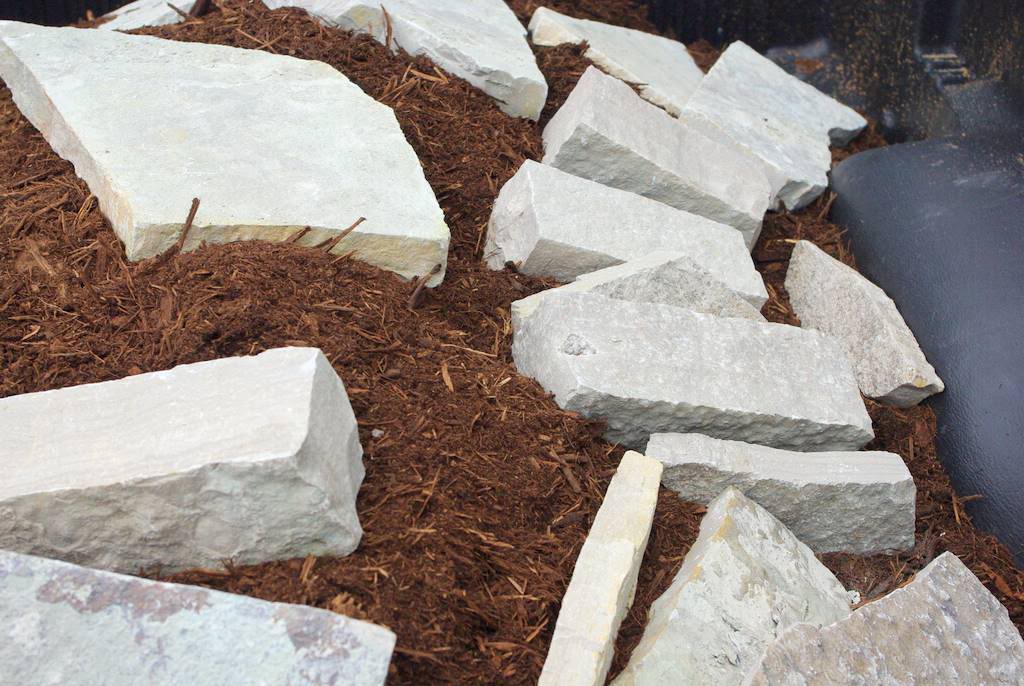
I had to extend the retaining wall a little bit, put down some mulch to keep my boots from getting completely caked in mud, and I used a board to kneel upon for the same reason: muddy, soaking wet knees in cold weather is less fun than it sounds.
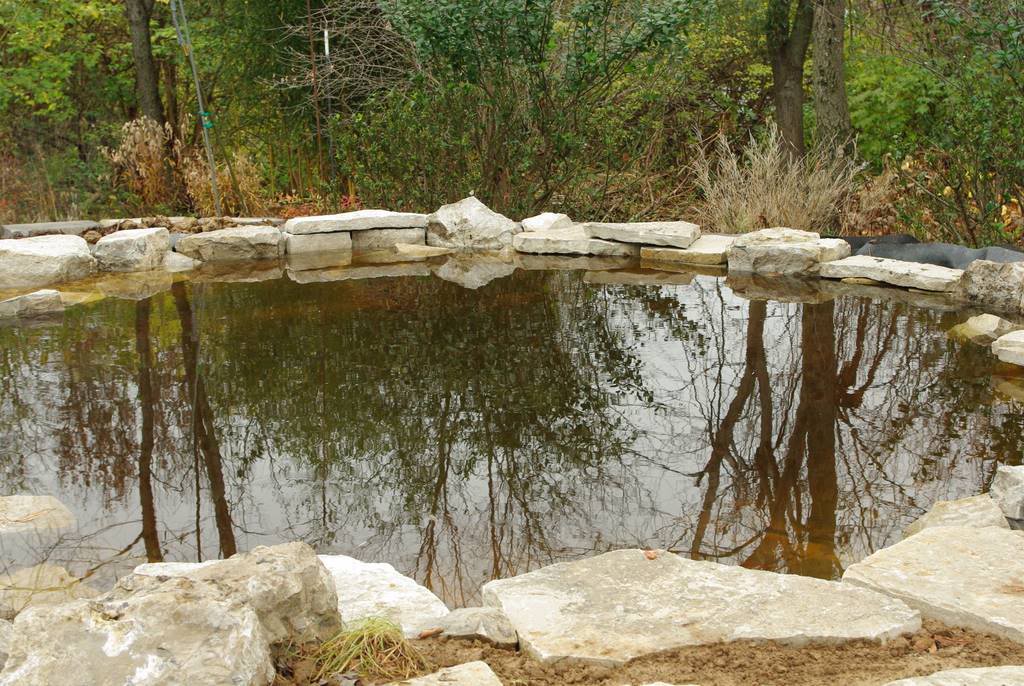
After a bit of trial and error to find rocks that fit the final gap, I completed the edging:

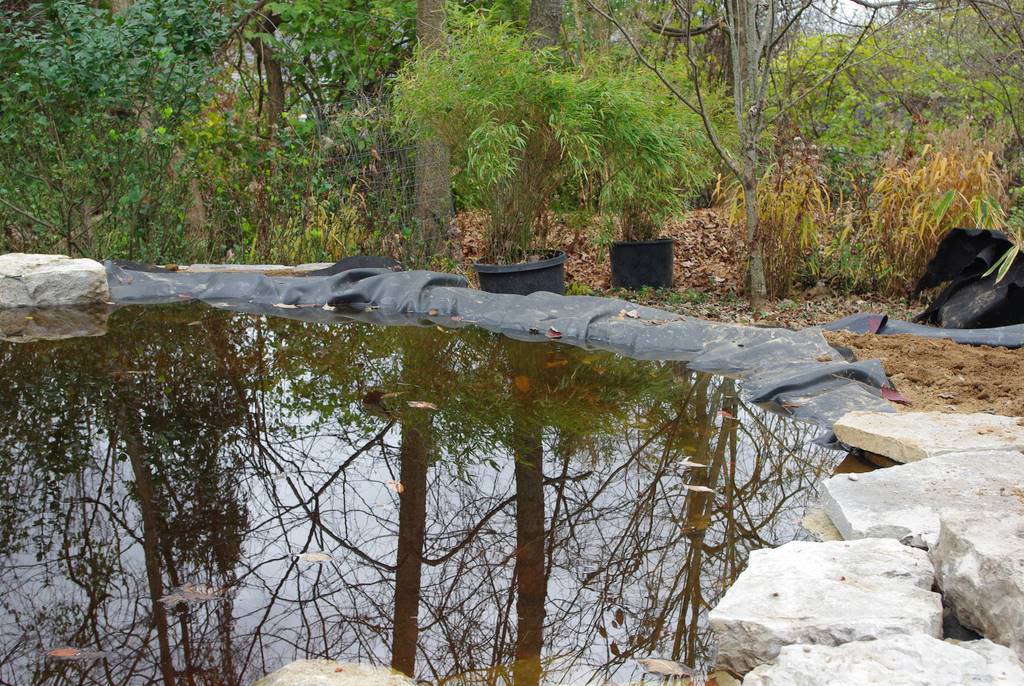
I didn't trim or bury the liner edge completely around most of the back, as I'm not sure if I'll need to make some adjustments or changes in the spring.
I had a few longer pieces of flagstone left, so I decided to create a little overhang:
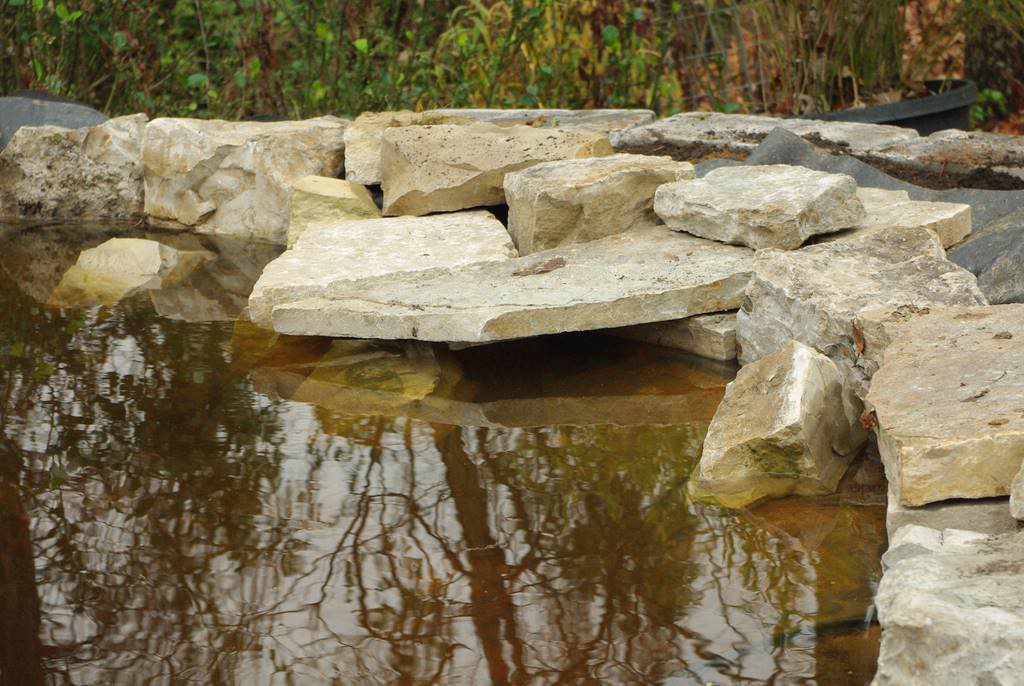
I'm not sure if I like this, but I'll leave it for the first year and see what I think after there are some plants around. I thought it would be a fun feature for fish and other creatures, but we'll see.
I may create an island in the middle of the water in the spring when the water warms up, and there may be some minor changes or adjustments I'll need to make, but I don't plan on doing much more with it this winter.
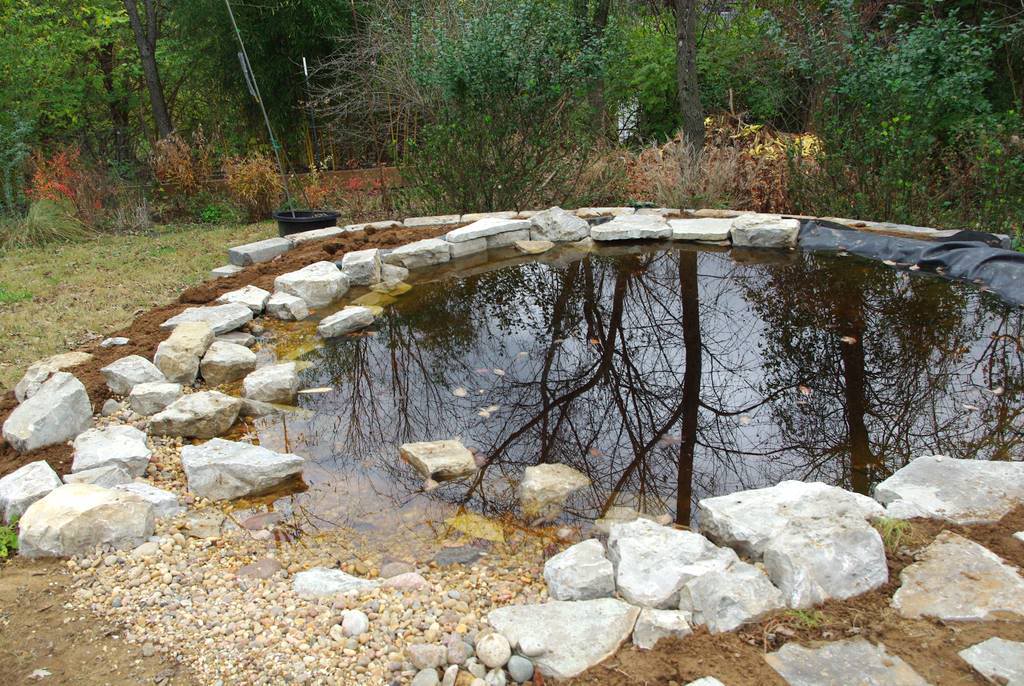
Take a look at the whole back edge, and see at how I tried to make it as "natural" as possible:
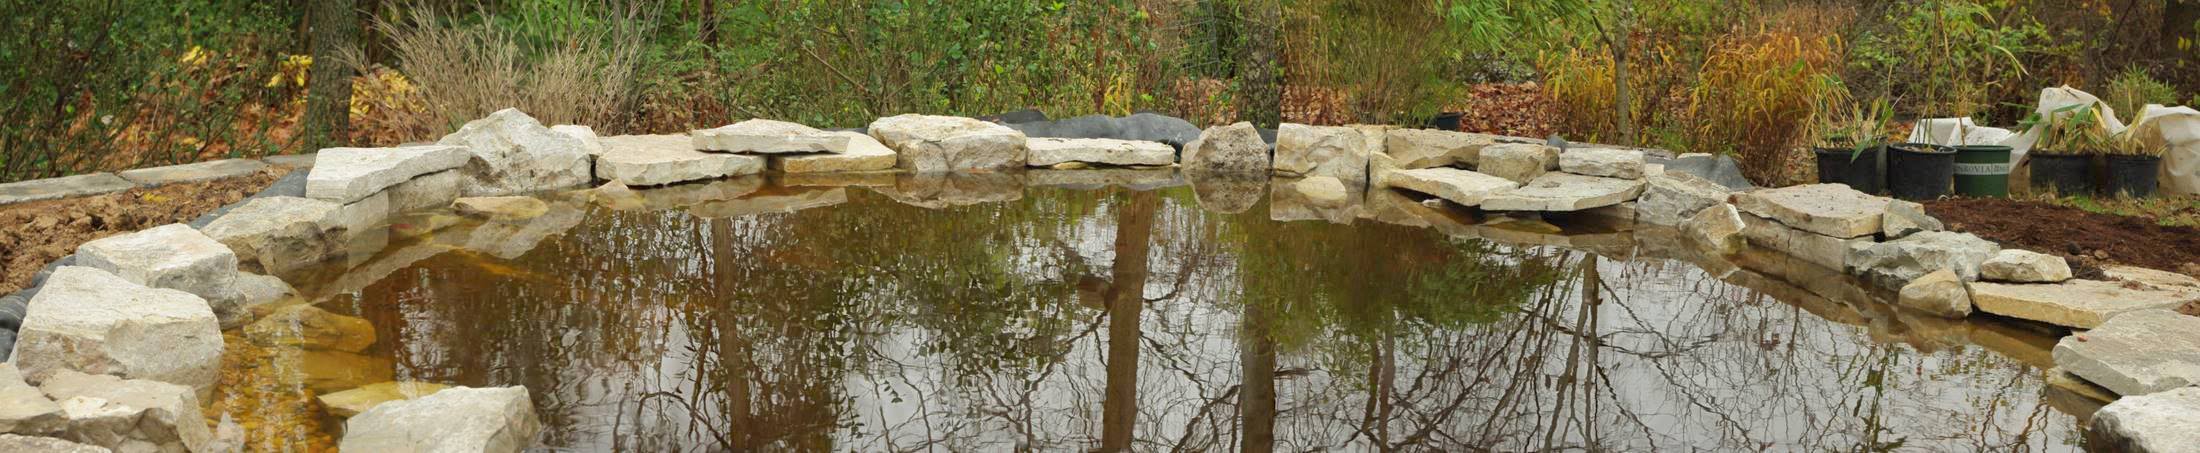 |
| click for much larger size, or r-click and "open in new window" |
Here's the whole "finished" project:
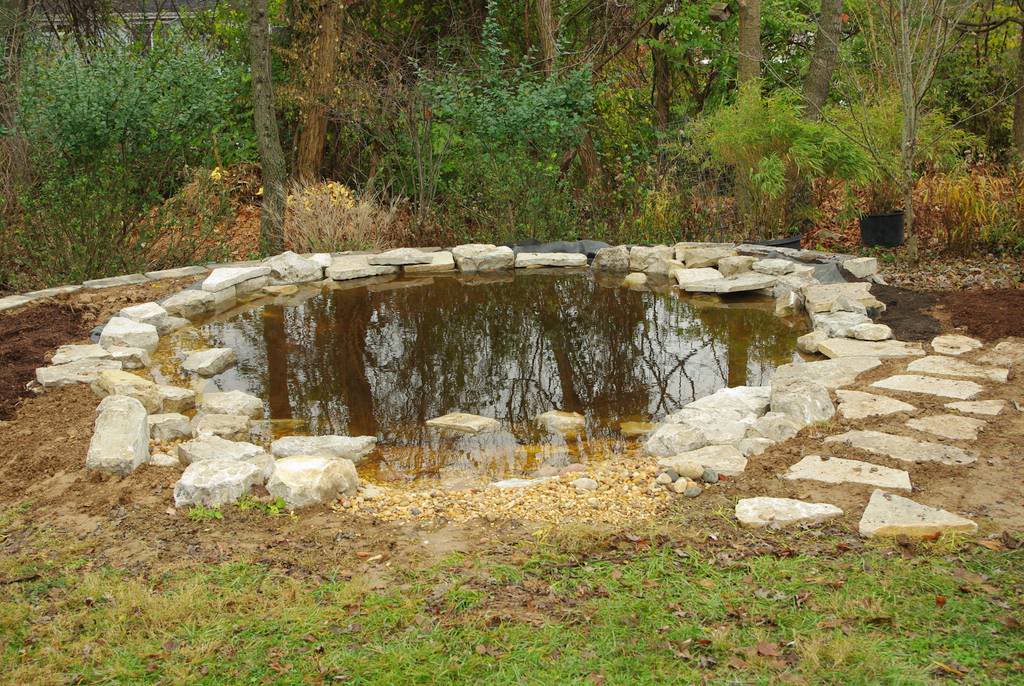
I can't wait for the plants!
This was a lot of work, but I'm so glad I jumped in and did it now before winter. If I had waited until spring I doubt it would have been ready for the frogs, but now... bring the little croakers on!
I wonder if I'll have turtles too?
.


Looks really good. It adds so much more to the garden, especially to have the reflection of the trees in the dark water. I'm sure the critters will come. We have a frog who is keeping warm, on these freezing nights, by spending the night in the skimmer of our pool. Are you planning your planting scheme?
Alan, can I teleport your pond to my yard? I love it and can't wait to see it in the spring.
L rose: yes, I've got lots of ideas for plants already, but will plan more of it out this winter. Exciting!
Gerhard: if I knew you could do that I would have had you teleport the soil out so I wouldn't have to do any digging.
I also forgot to mention that Friday when it was nice I saw a damselfly land on one of the rocks. Not expected at end of November!
Excellent work, Alan! You did a great job accomplishing the natural look. I can't wait to see the plants you choose.
As always nearly perfect! I like the overhangs. I do wonder about your plan for an overflow when we have 20 inches of rain this coming spring?
John: The back edge in front of the retaining wall will be where the overflow goes. There will be water-loving plants here. The soil already got saturated when the liner drooped before the rocks were in, so I think it will work well. Ask me again in the spring. :-)
Alan, it looks amazing!! I love the overhang, the beach and how natural it all looks. I can't wait to see it with plants (and frogs!!).
How exciting Alan, it looks amazing!! What great timing to have it finished before the freezing weather hits too, although doing it in 2C is crazy! Love the rock used...Great accomplishment!
Maybe I missed this, but are you installing any kind of pump or skimmer for circulating the water?
It looks great by the way!
Lisa: nope.
Wow! I'm really jealous on all that free space! And the fact that you gave it a perfect meaning! Congrats on all that hard work!