Planter box build: day 1
This past weekend I helped my friend Eric build a planter box for the bamboo I gave him earlier this summer. Although this is a pretty large plant, it kept blowing over, and it really needs more room than its pot can provide.

The nice thing about letting them have the potted bamboo for a month or so before permanently planting it is that they could move it around and figure out the best place for it. They already knew they wanted it positioned to provide late afternoon shade for their deck, but exactly where wasn't certain. As it turns out, the first place we put the pot was decided to be the best place for it, so that's where we'll build.
Although I've built raised beds before, this was a little different for a few reasons. First, it's going in somebody else's yard, so it had to look good. Second, it had to provide more containment of the bamboo than the boxes in my yard do -- my friends don't want to worry about bamboo taking over their small backyard. Third, it couldn't be too complex or require fancy tools. We're not professional carpenters, nor do we have a large collection of expensive tools.
After some consideration, I decided on the design of a simple wooden box built on a base of concrete patio stones. It took a little while to convince my friend Eric, but after showing him my escaped rhizome, he was convinced.
We started by laying out the patio blocks:
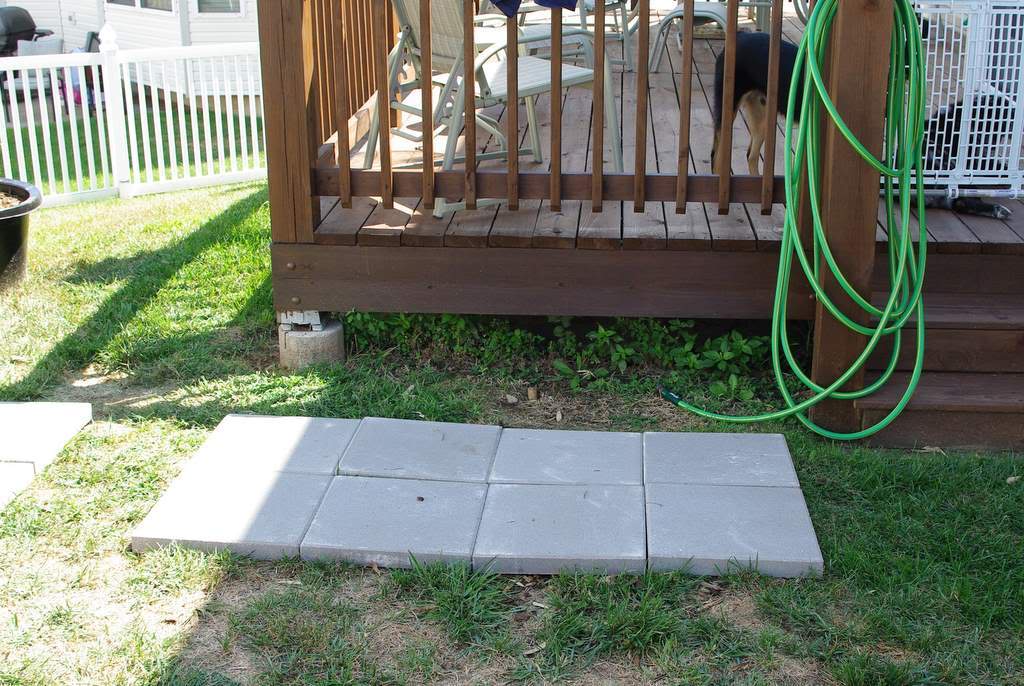

The stones are 16" square, so the dimensions of the box would have to be even multiples of 16 -- we don't want to cut any stones. Originally we were going to make the box 32" wide by 8 feet long (2 stones by 6 stones), but we decided to take 2 stones off the length, making the final size 32" x 64". That size just fit the space better.
Next, we cut around the edge of the stones, then removed the grass:
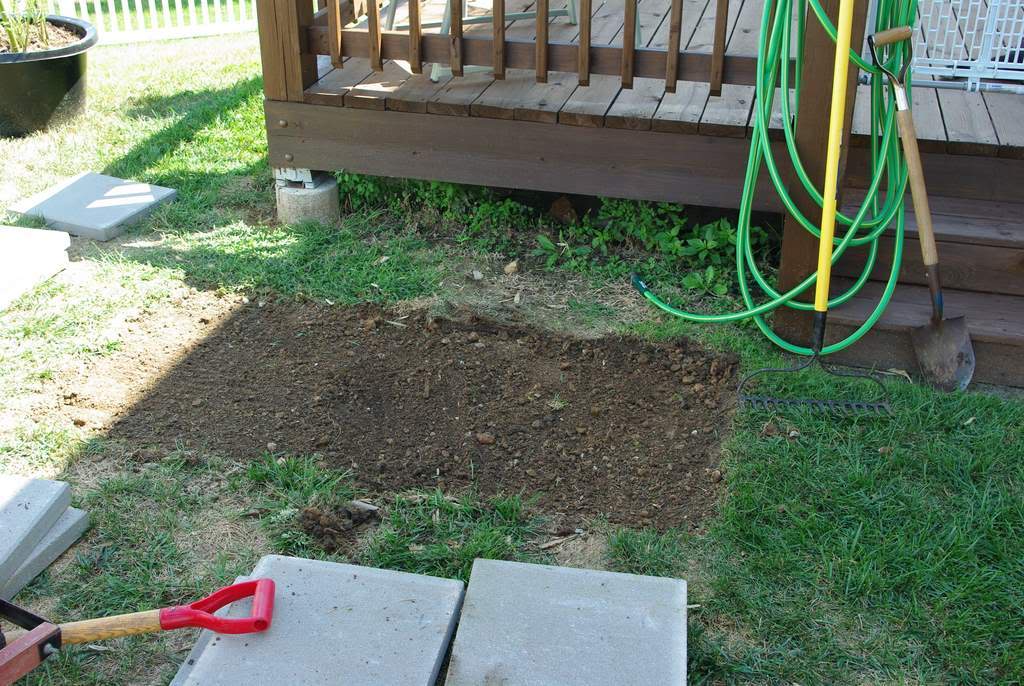
The ground was pretty flat already, but we leveled it out even more and tamped the heavy, rocky clay soil down before laying the stones.
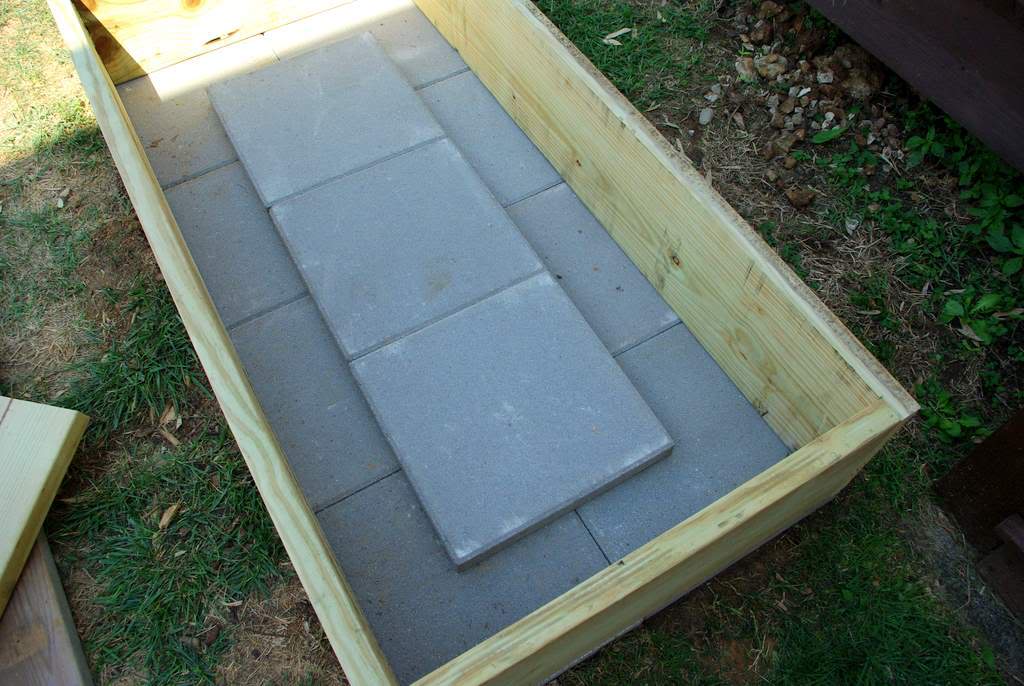
Since we had four extra stones after reducing the size of the box, we decided to cover the joints for extra protection from escaping bamboo rhizomes:

It's important to get the base solid and level, so we took our time with it. Next we cut the box pieces and screwed them together with a couple of deck screws at each corner:
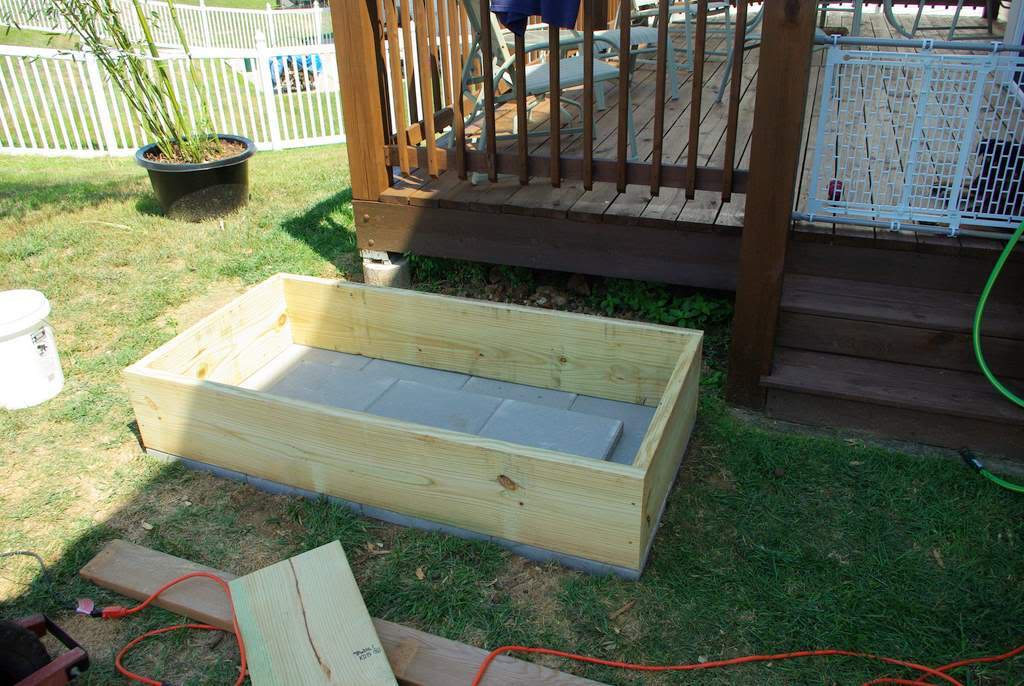
The corners will be connected with lag screws (deck screws sometimes just don't have the holding power to last more than a few years in these boxes -- that's one thing I've learned from the boxes in my yard), so the screws are just sort of "tacking" the pieces together right now.
Next we added the second level. By the way, we're using pressure-treated 2x12 pine lumber.

Ok, now the tough part, and the part that I was a little concerned about. Previously when I've built raised beds, I've put the corner posts (when I used them) on the inside. For this box we needed the posts on the outside, since we didn't want to have to cut notches in the corners of the patio stones. Less work is better, and less chance for mistake, right? Plus I didn't want to risk having rhizomes push through any gaps between the stones and the corner posts, since that area wouldn't be visible.
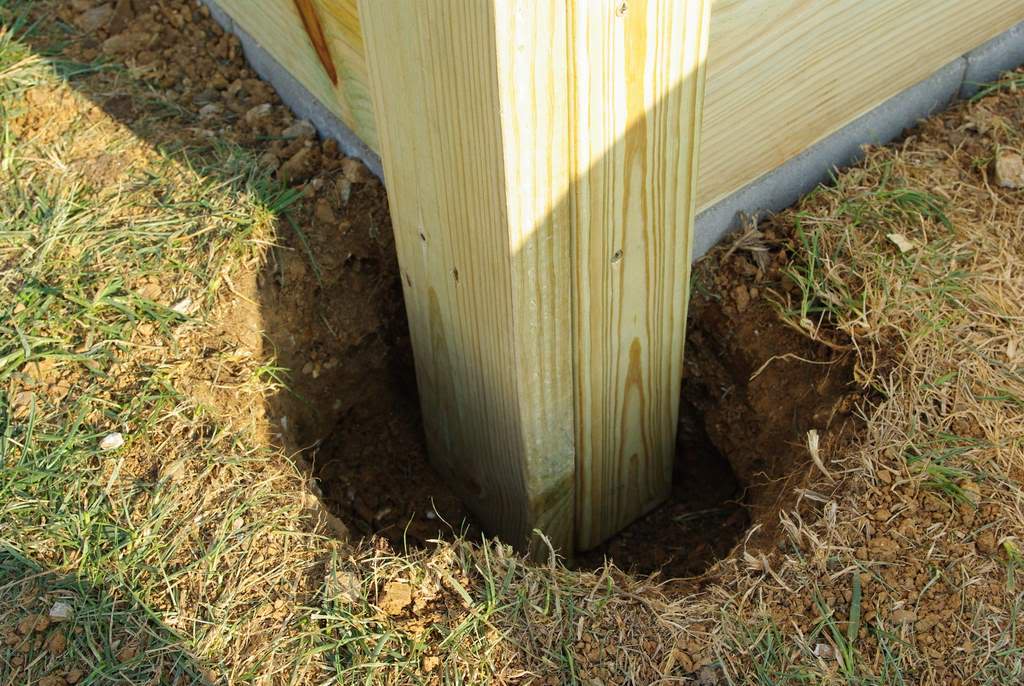
So Plan A was to create a corner post using a 2x4 and a 2x6, and pound them into the ground. We got the first corner in without too much trouble:

It was difficult, but not too bad. We left the posts long, since we knew that pounding would damage the ends, and we'd want to cut them off anyway.
When we got to the second corner though, we started hitting a lot of rocks. It was impossible to drive the posts into the rocky ground, so we went to Plan B: dig a hole at each corner (the remaining three) and pour concrete to anchor the posts. It was time to start digging.
Oh, there were a lot of rocks in that soil:
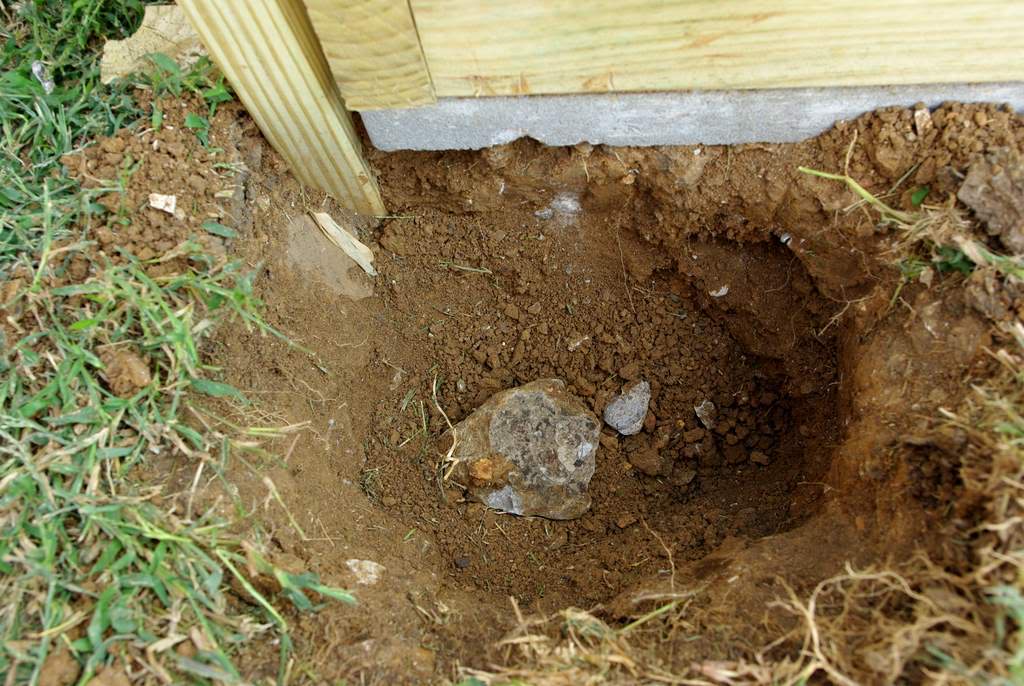
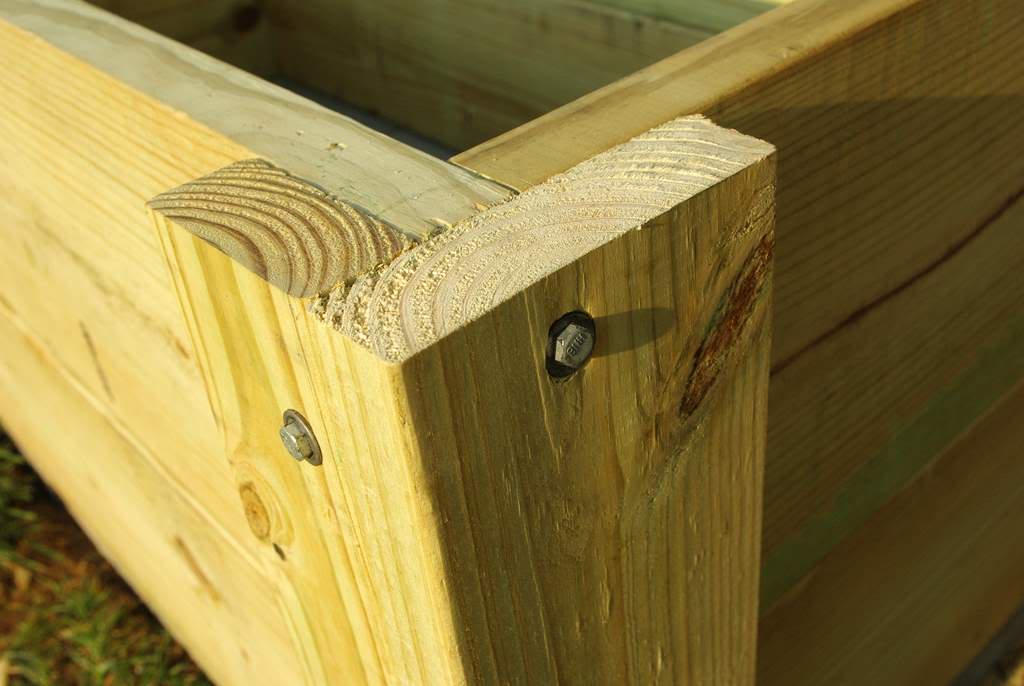
Since we hadn't planned on using concrete when we started this project, Eric had to go buy a few bags of ready-mix while I started the digging. He was back well before I was finished, so the last hole was all his. We cut the posts to size and screwed them in temporarily.
Once they were all tacked in place, we removed one screw at a time, drilled a larger pilot hole for the lag screws, then drove the screws in. Unfortunately Eric couldn't find his driver bits so we couldn't use the drill to drive these, so we had to use wrenches and sockets and elbow grease.

Once all of the lag screws were installed, we mixed the concrete and poured it:

The last step for the day (we were both pretty much exhausted) was to staple some plastic sheeting along the inside of the box.
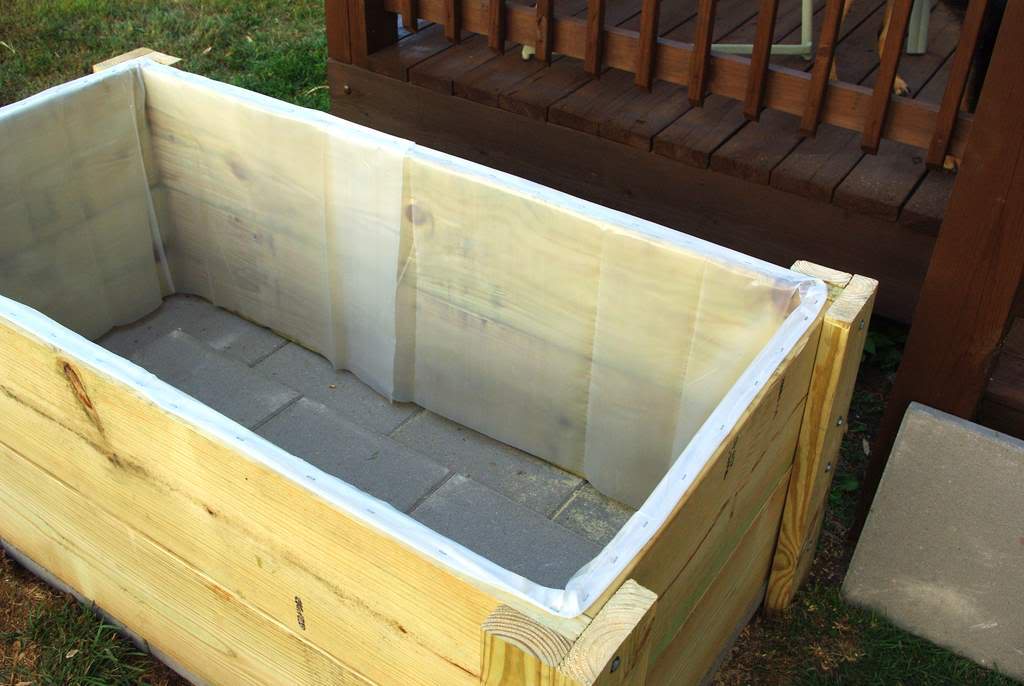
I like to do this to provide some extra protection for the wood. Even though it's treated lumber and should last many years, keeping the wood out of contact with soil will just extend its life. If the plastic adds just two or three more years to the life of the wood, then it's worth it. I suspect it adds even more than that though.
One nice thing about having a big potted bamboo nearby is we could move it around so it provided the best shade for us, regardless of where we were working.
Tomorrow we'll fill the box, plant the bamboo and add some finishing touches. What an exhausting yet satisfying day of "gardening"!


Just curious. Why the concrete? Doesn't seem necessary to me.
Jeff: good question! From my experience even though Phyllostachys rhizomes won't typically go more than 12" deep when in the ground, when they're in a raised planter they'll go much deeper. In fact, I think they don't know the difference between the side of a raised planter and the ground -- to them they think they're near the surface. So even if this were a 6' tall planter they'd run the entire height, get into the ground, and escape into the yard.
The concrete slabs ensure that no rhizomes can escape with the minimal amount of work on the homeowner's part.
Or were you talking about the concrete for the corner posts? In that case I was concerned about the plants getting tall and top-heavy, and eventually causing the planter to shift.
Since this was my first box build, it was really over-done. I now know that not only is the concrete anchoring the corner posts not necessary, but the posts themselves are not needed.