Plumeria: planting sticks
So it's Saturday morning, 6:30 AM, sunny but cold (45F) and windy. How should I start my weekend of gardening? By planting some sticks!

These are Plumeria cuttings. I've wanted to grow Plumeria for a couple of years, but finally this Winter got my act together and ordered a couple of cuttings. It's time to plant them!
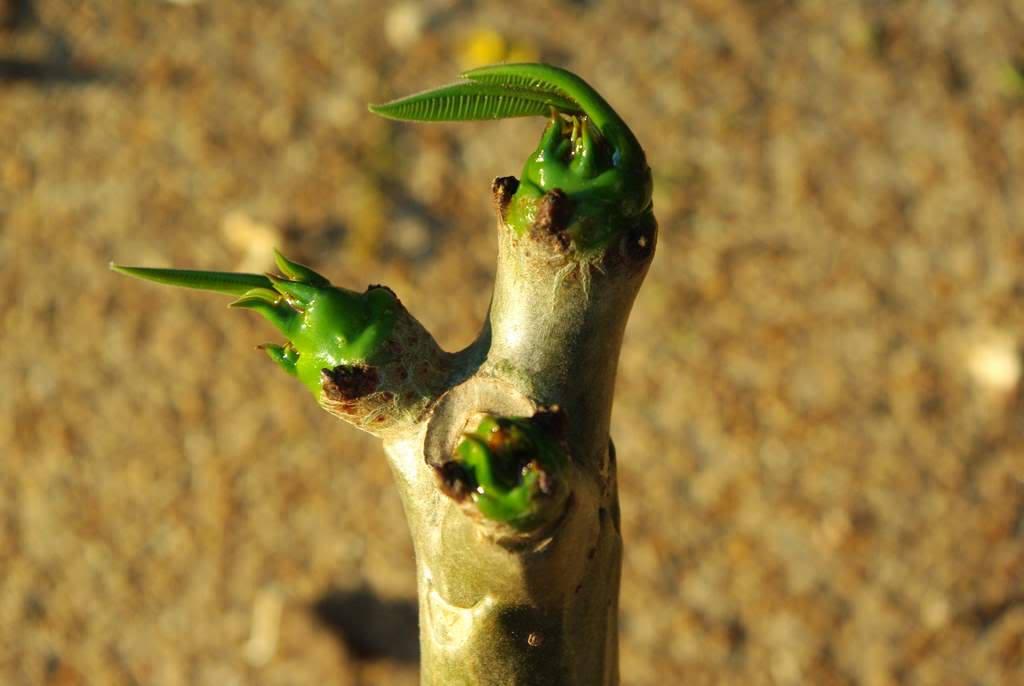
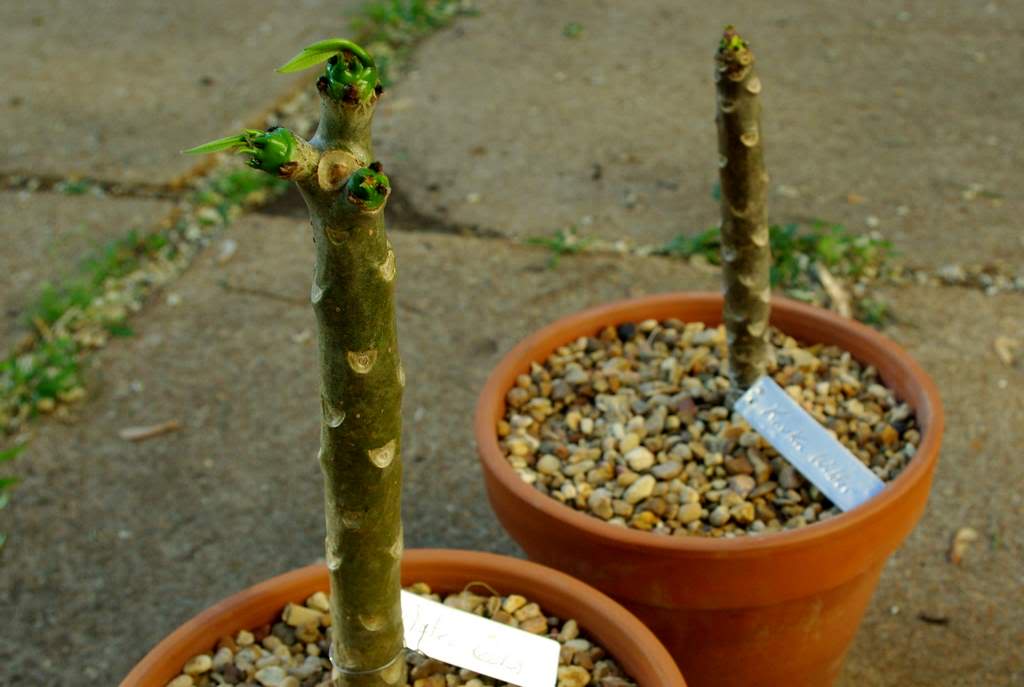
Plumeria is the genus of plants that produce the incredible flowers often used in Hawaiian leis. The flowers are beautiful, come in all sorts of colors, and have various types of fragrances. I've chosen two different varieties form my first attempt at growing these: 'Aztec Gold', and 'Kauka Wilder' (I don't know the species of these -- the nursery I ordered from didn't list the species name). My cuttings have just been sitting on a shelf in the basement for a few months, and they appear to be "waking" up now so it's time to plant them. This one ('Aztec Gold') seems to have three growing tips, which I think will each turn into a new branch:
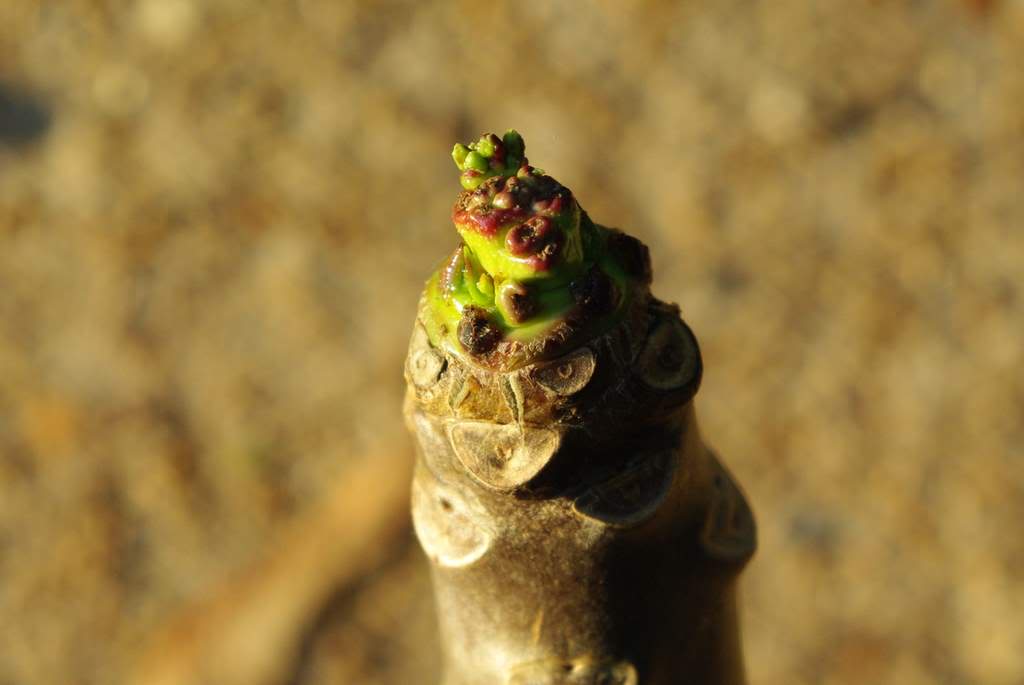
This one ('Kauka Wilder') has only a single growing tip, but it looks like it wants to develop a flower bud. Maybe not, but it looks different than the other plant's growth so far:
Since they're tropical plants, I'll be growing them in pots. Then when the temperatures dip to the low 40's in the Fall, all the leaves will drop, the plants will go dormant and I'll put them in the garage for the Winter.
I haven't done this before so I had to research how to pot them, and it seems to be quite simple, so let's get started. First step is to choose the right size pot. These are about 10" wide, and are just basic, cheap clay pots. Since they're coming in each Winter I don't have to worry about something that's going to crack when it freezes. I want to use something pretty heavy though, because these plants can get large and I don't want it to blow over all the time.
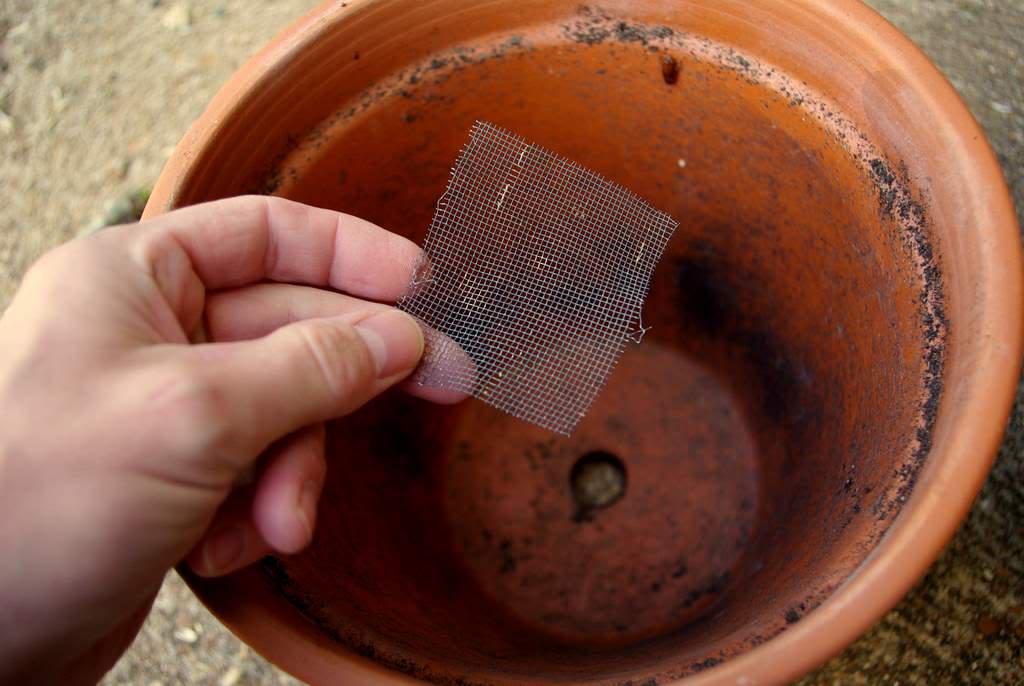
I always put a square of metal screen in the bottom of my pots (no matter what I'm planting in them) to help keep the various insects out. I found an old screen in a neighbor's garbage can a couple of years ago and have been using it ever since.

The potting mix needs to be well-draining, so I mixed a lot of Perlite into regular bagged potting mix -- about a 50-50 mix or maybe a little less Perlite. Notice that I left some room -- you never want to fill the pot to the top with potting mix. Leave room for some mulch and for watering!
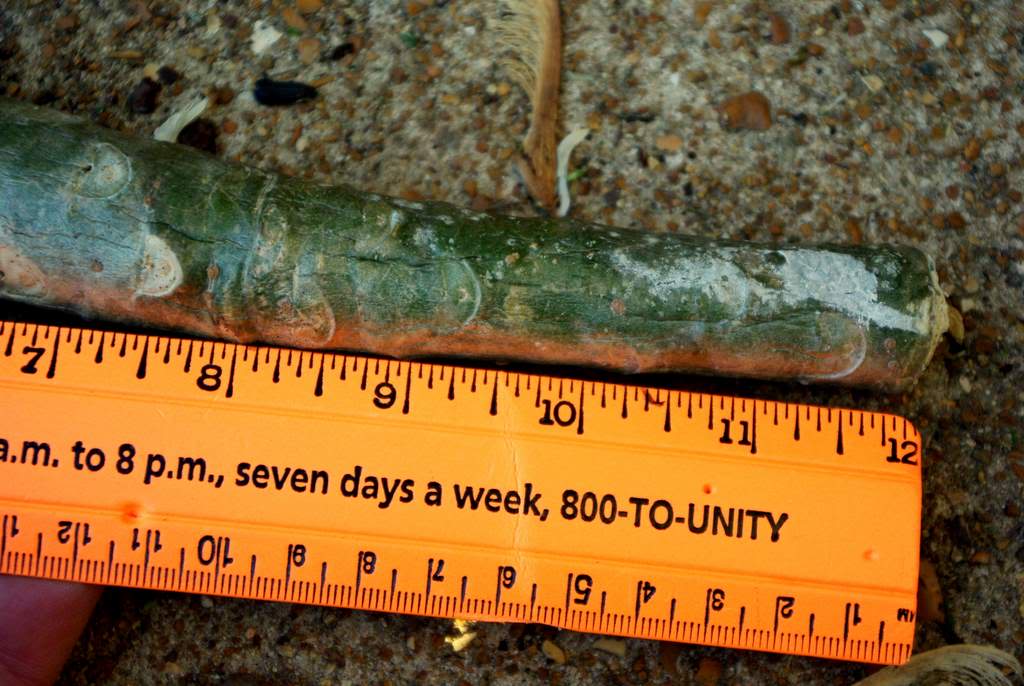
Now I measure and make two pencil marks on each cutting, 3" and 4" from the end:
Next dip the end in water and a little rooting hormone.
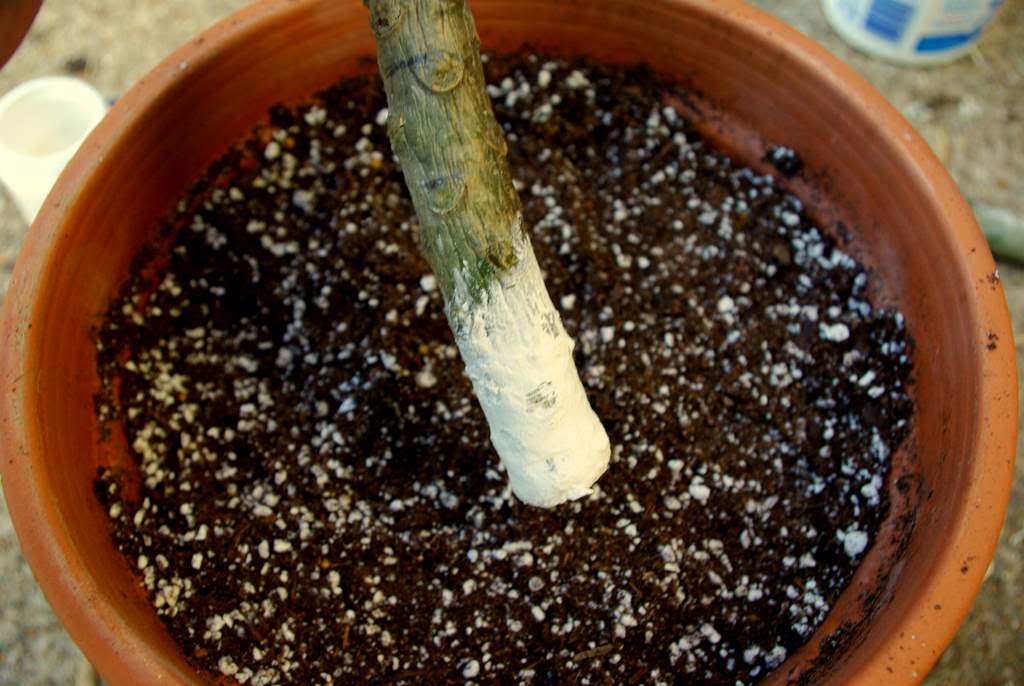
Stick the cutting into the soil to the 3" mark:
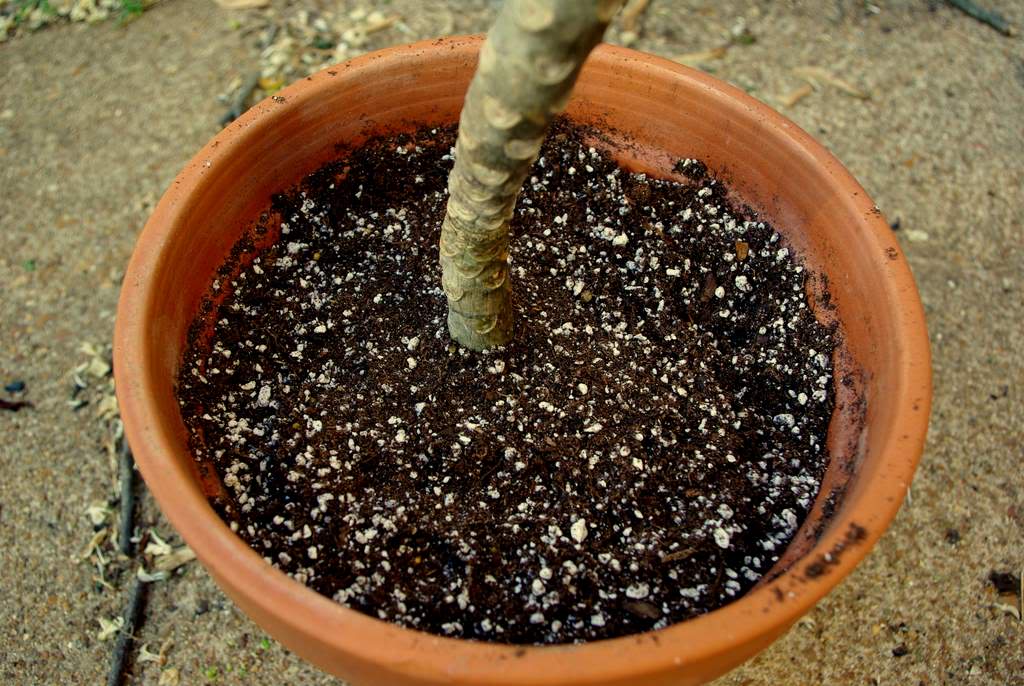
Finally, add about 1" of gravel -- up to the 4" mark. This will help hold the cutting in place while it roots. That's about all there is to it!
I read conflicting reports on if you should water after planting or leave it dry. Too wet is a big problem for Plumeria, but I did give it some water right now. I won't water it again for a couple of weeks. I'll try to keep it somewhere that won't get much rain either, but definitely somewhere warm and sunny.
Since the temperature is supposed to dip down to below 40F tonight, I'll be bringing these pots into the garage or basement, but then they're back outside.
It will be a few years before I can think about making my own leis, but I'm excited to see what these plants do for me. Trying new plants is one of the most exciting things about gardening, don't you agree?


Thank you for this post. I just purchased 2 plumeria sticks, I will be potting them up tomorrow. I know this post is pretty old, but how have your plumeria fared?
Thanks for asking! Those original 2 Plumeria died over the first winter (kept in the garage), but I got more the next spring and those are doing quite well. Use the "Search" feature on "plumeria" and you'll find all of those posts.