Bird planter(s) project
Remember my terra cotta bird planter?
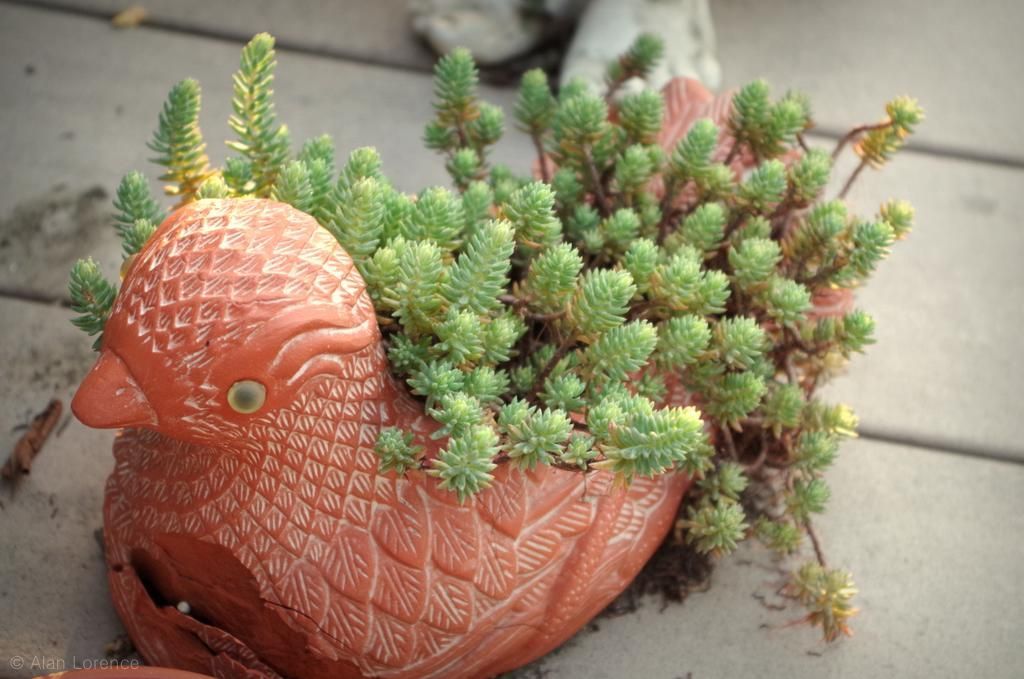
It's lived on my deck for the past five years or longer, holding cold-hardy succulents while braving the heat of direct sunlight on the deck and below-zero temperatures each winter. When I first put it out here I thought it was weird and it didn't really fit my gardening style, so didn't care how long it lasted.
I've grown to love it though, and I'm sad to say that it's finally reached the end of its life:
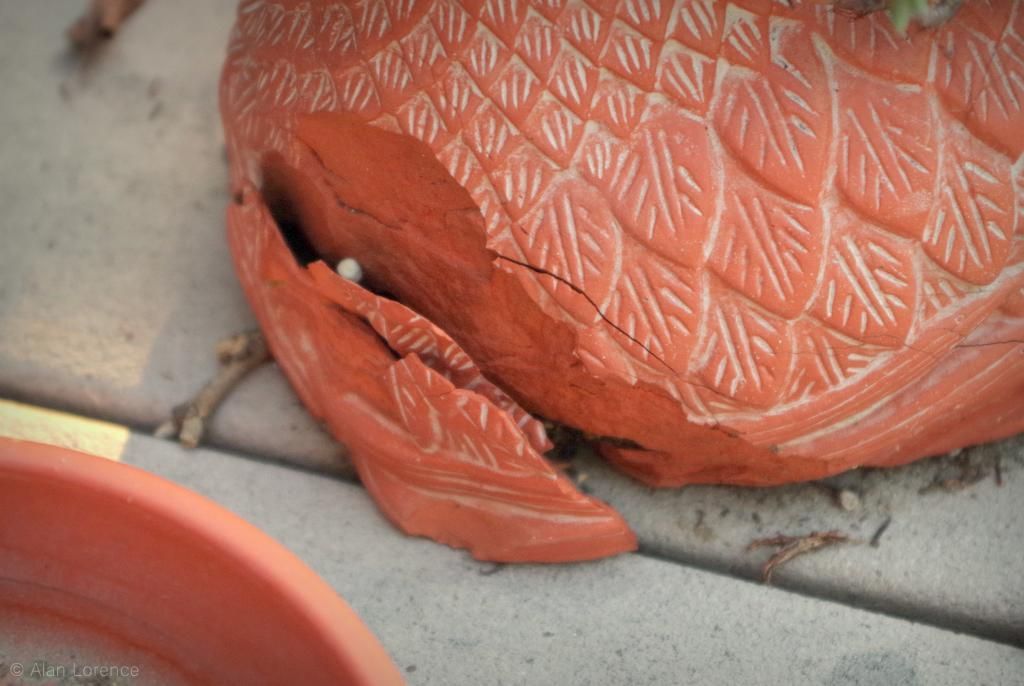
It's starting to crumble.

This has been in the back of my mind, and although I haven't actively been looking for another bird planter, I'd be so happy if I saw one.
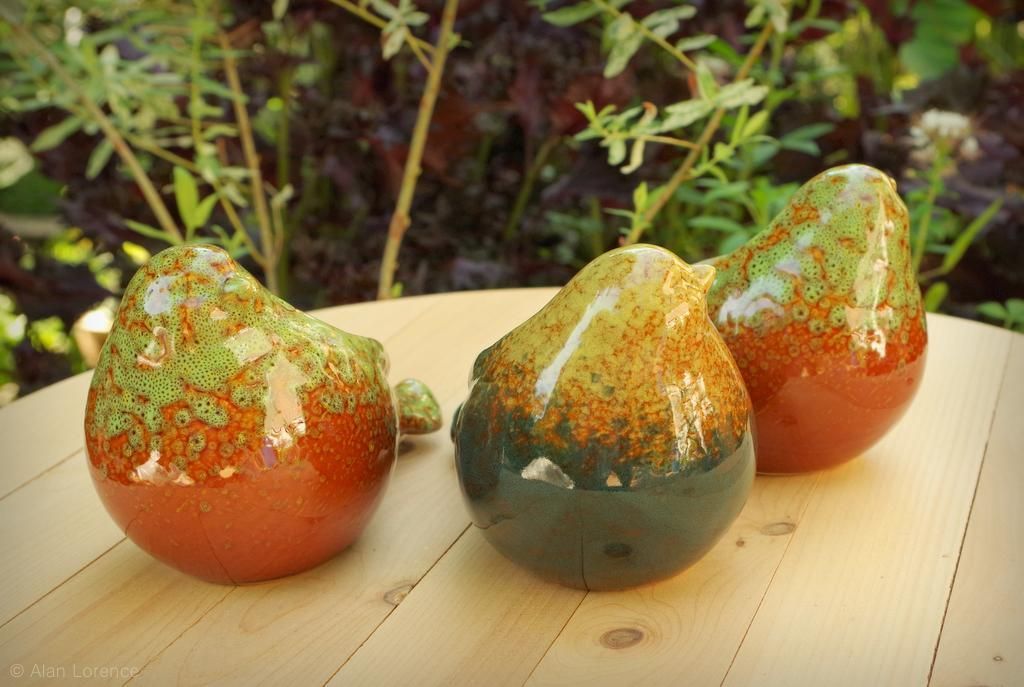
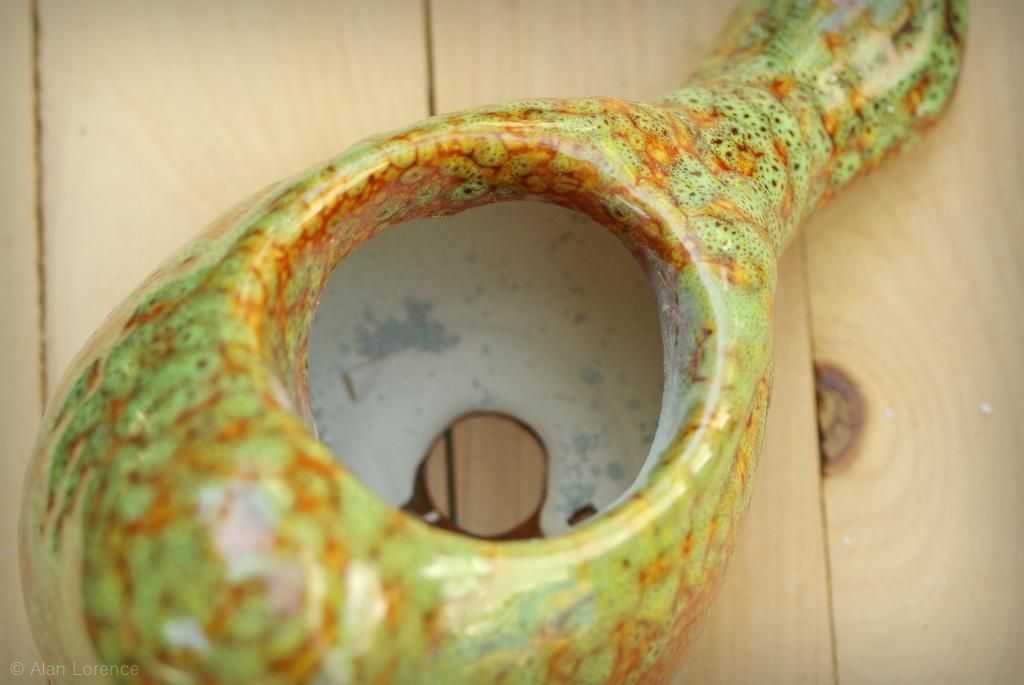
These are not quite replacements, but seeing them on the clearance rack at Lowe's got me excited and this trio came home with me. So pretty!
The problem is...
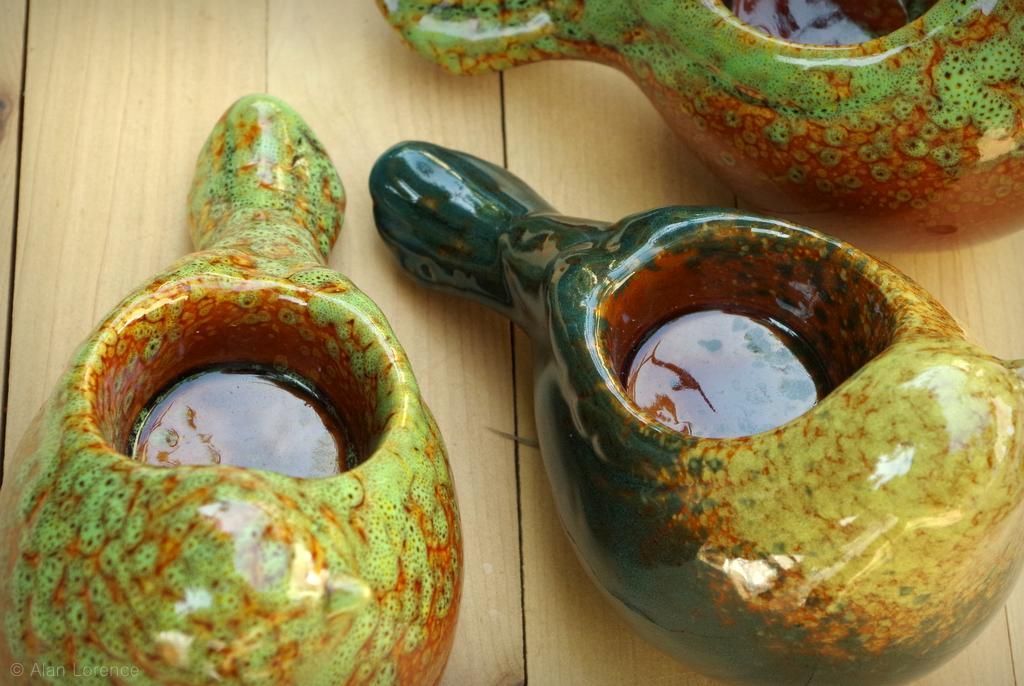
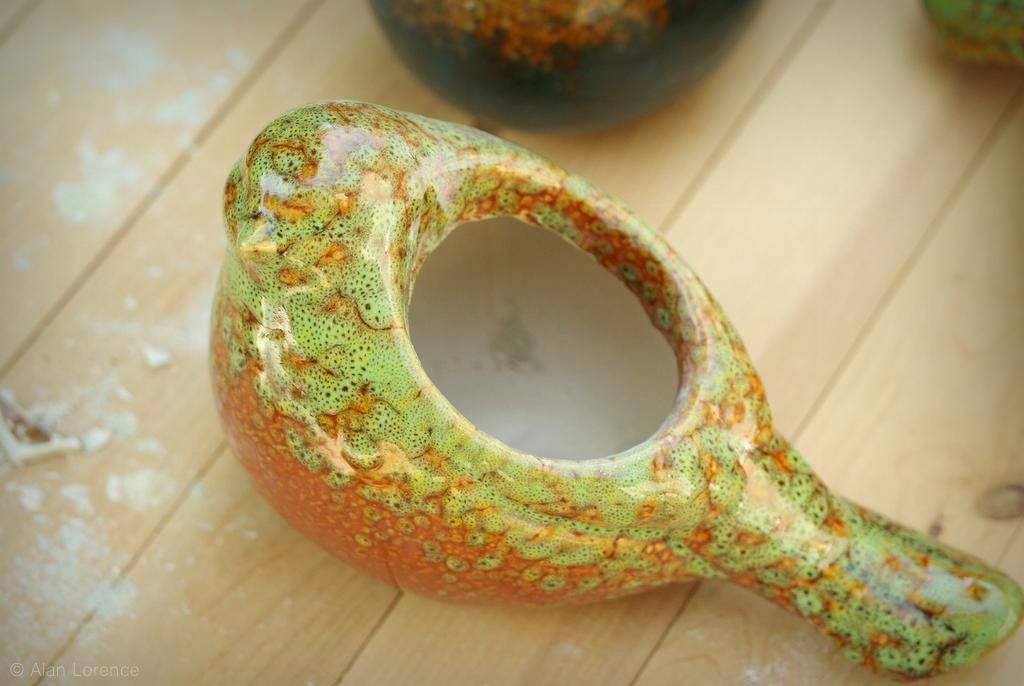
...they're not planters -- they're votive candle holders! All of that plump bird interior space not available to plant roots.
My first thought while still in the store was "I can fix these".

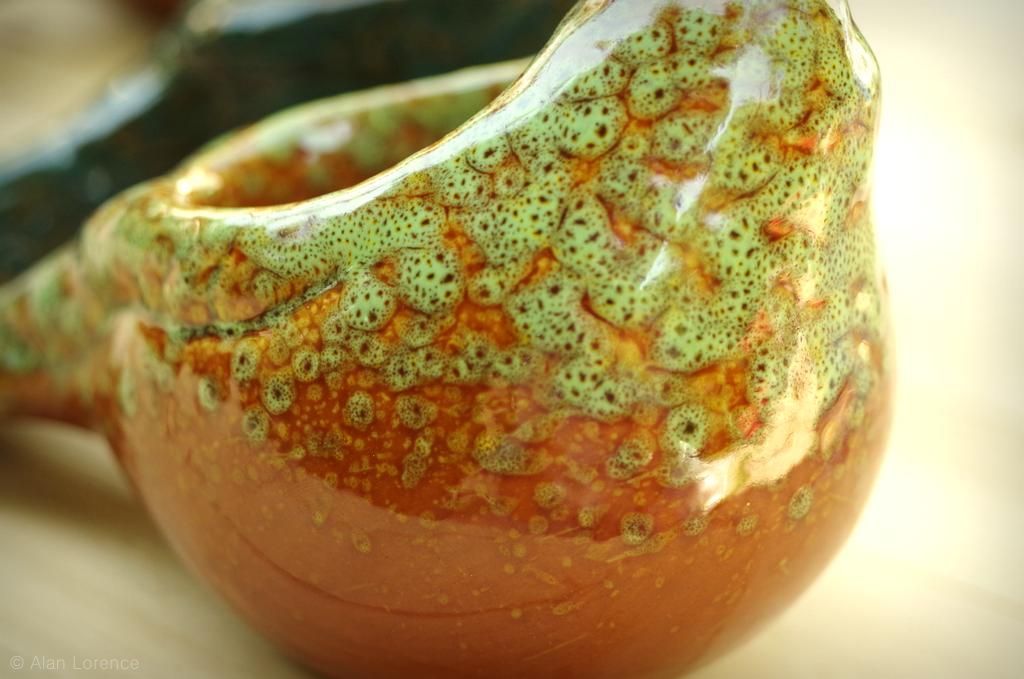
Since they're hollow I was pretty sure I could convert them into planters. I had never tried anything like this, but I'm on a roll with my projects these days so I just jumped in.
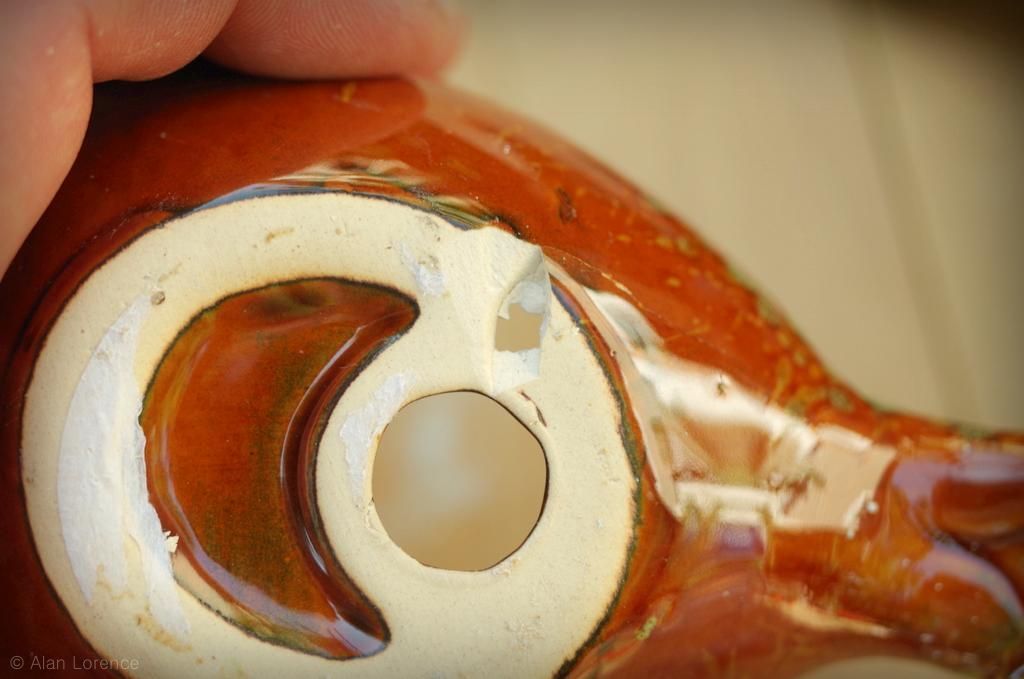
I grabbed the tile-cutting bit for the Dremel...
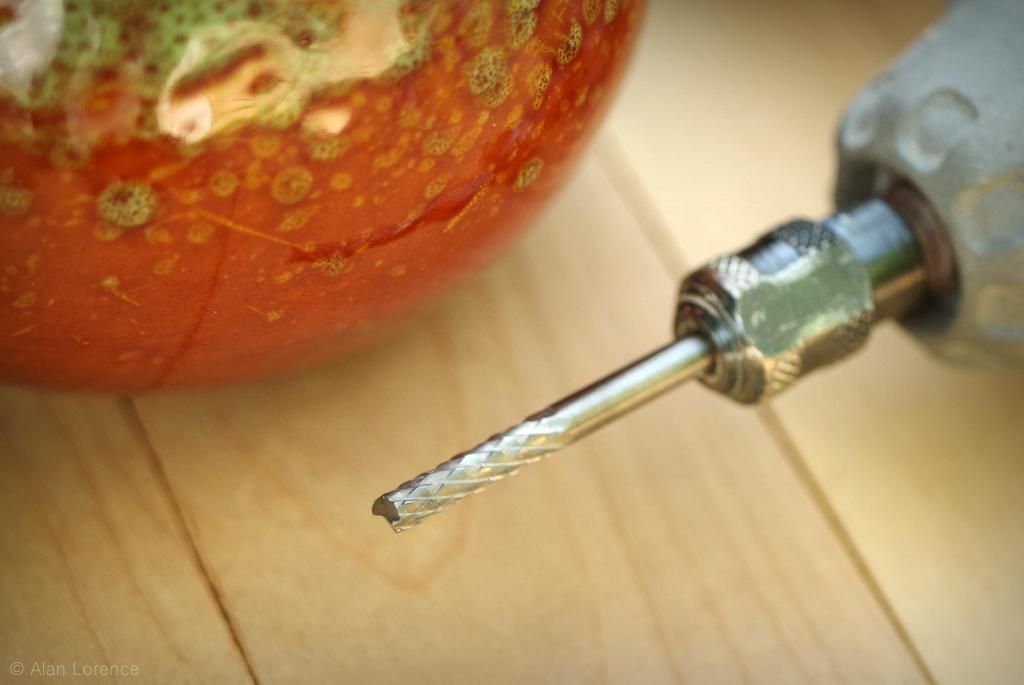
...and started to drill. Or cut. I really didn't have a good plan or any idea of what would happen.
As I was pressing harder trying to get the bit to dig deeper into the ceramic, a piece suddenly broke out:
It was completely unexpected and luckily followed almost exactly the line that I was envisioning.
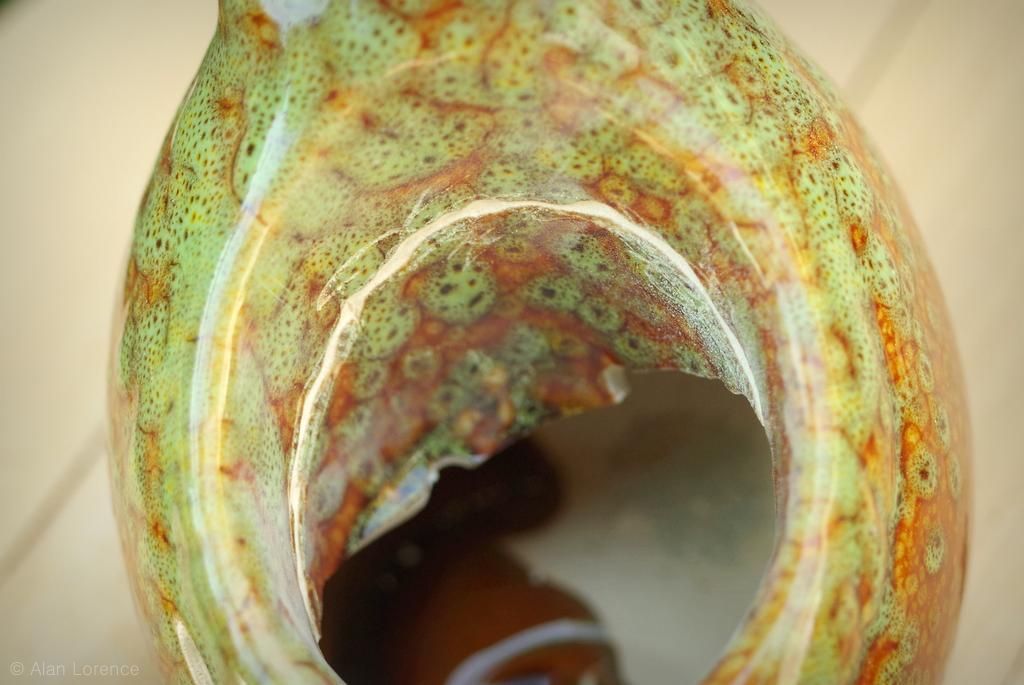
I decided to try a masonry bit in the drill:
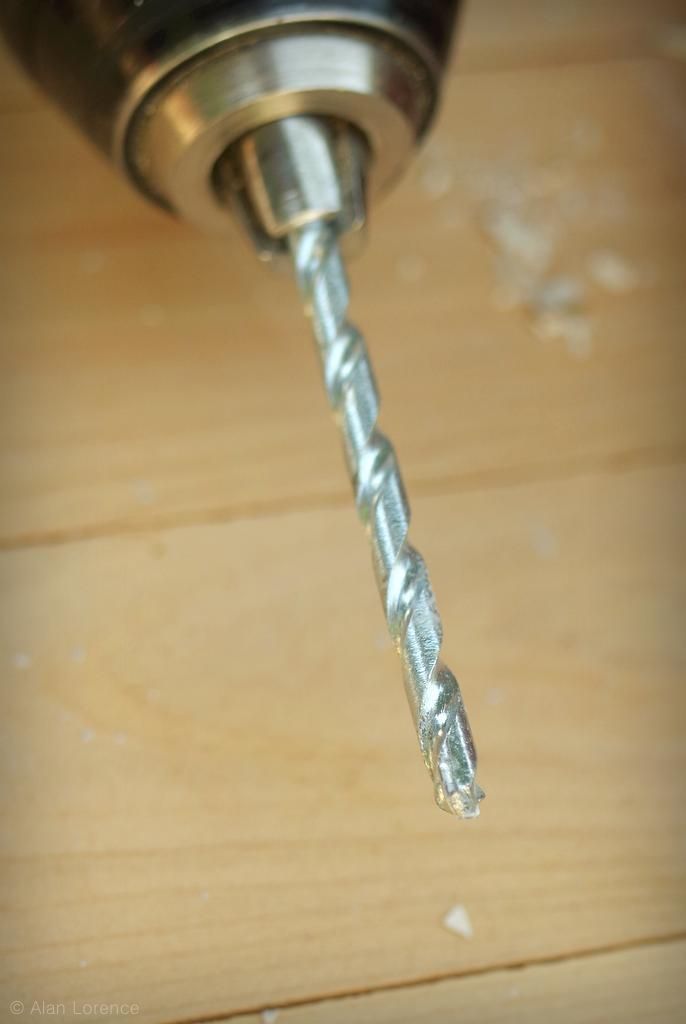
That was working about as well as the Dremel, and then an even larger piece broke free:
This was going great!
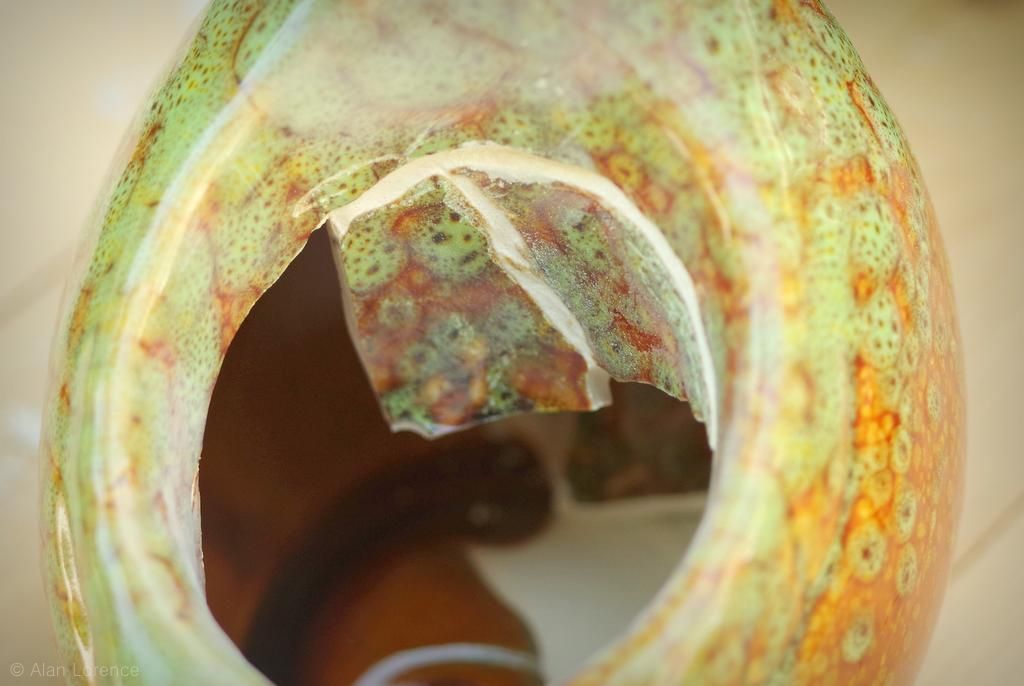
The weight of the drill cracked the bottom of the bird a little...
...but no major damage was done. This gave me an idea though: I'd "score" the area that I want removed (using the Dremel tile bit again):
In hindsight, it's not surprising that the ceramic behaved this way, much like glass. Score and snap.
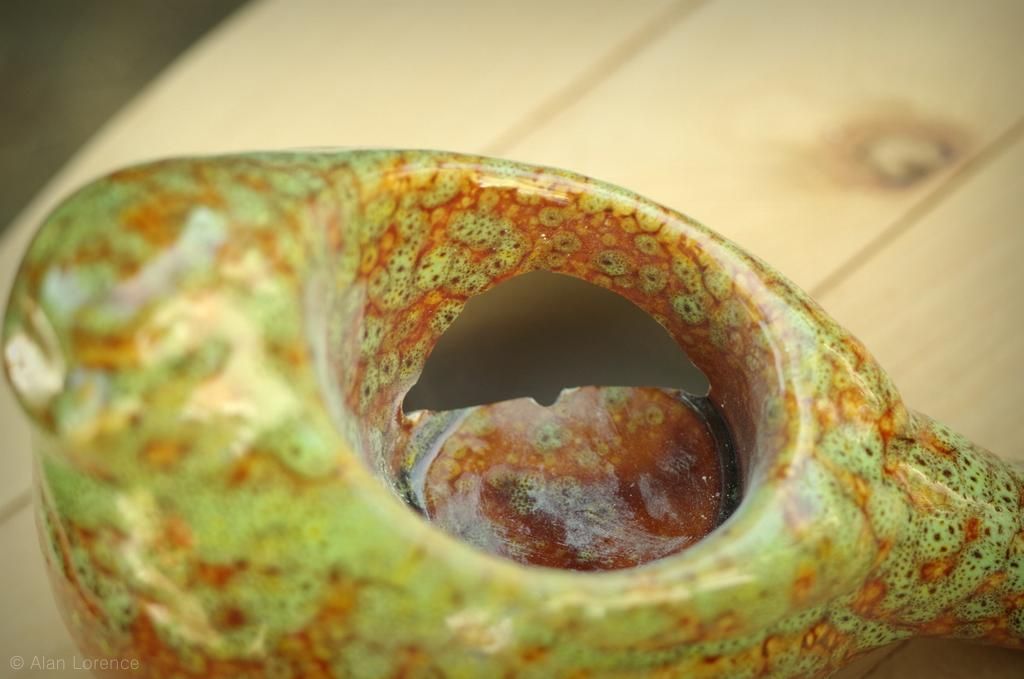
The curves made things more challenging and I've never really cut much glass before, so it was a lot of luck on this first one. After a few more tries and some tapping with long-nose pliers to get the smaller bits out, one was finished:

Not bad! I got smarter on the second two and just scored things then "drilled" -- pieces were breaking out almost exactly how I wanted them to!
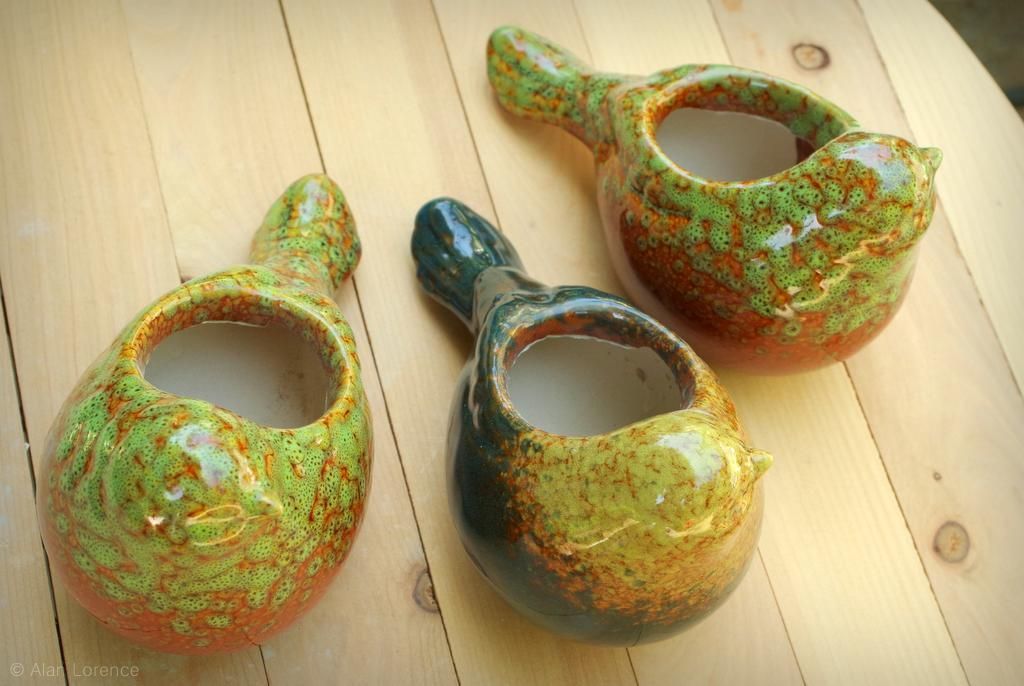
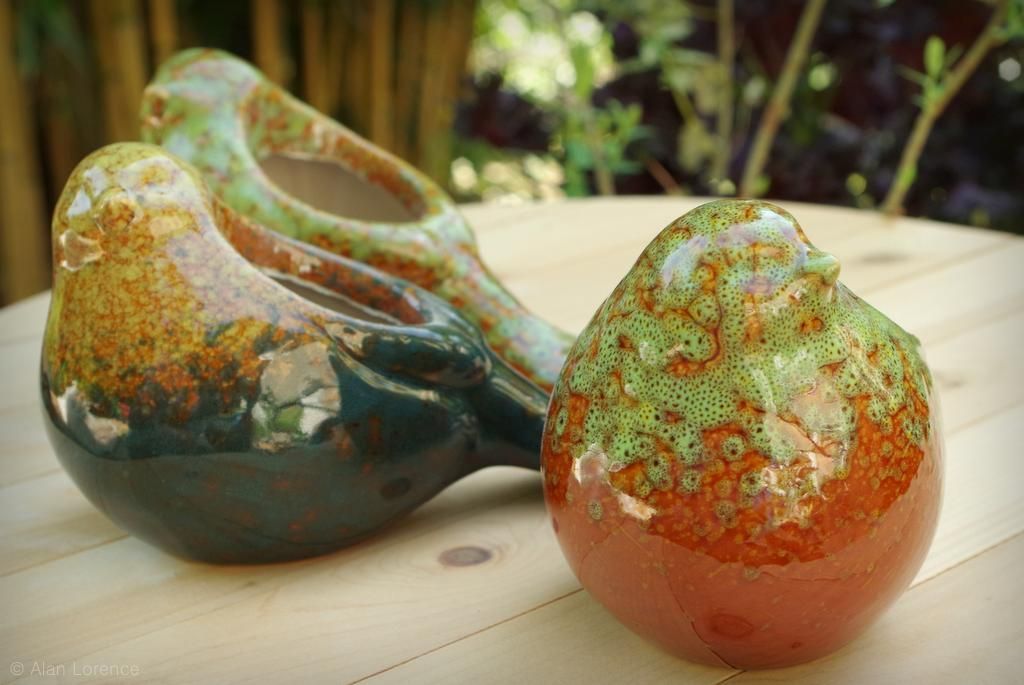
End result: three little bird planters!
Don't they need some plants? Yes they do:
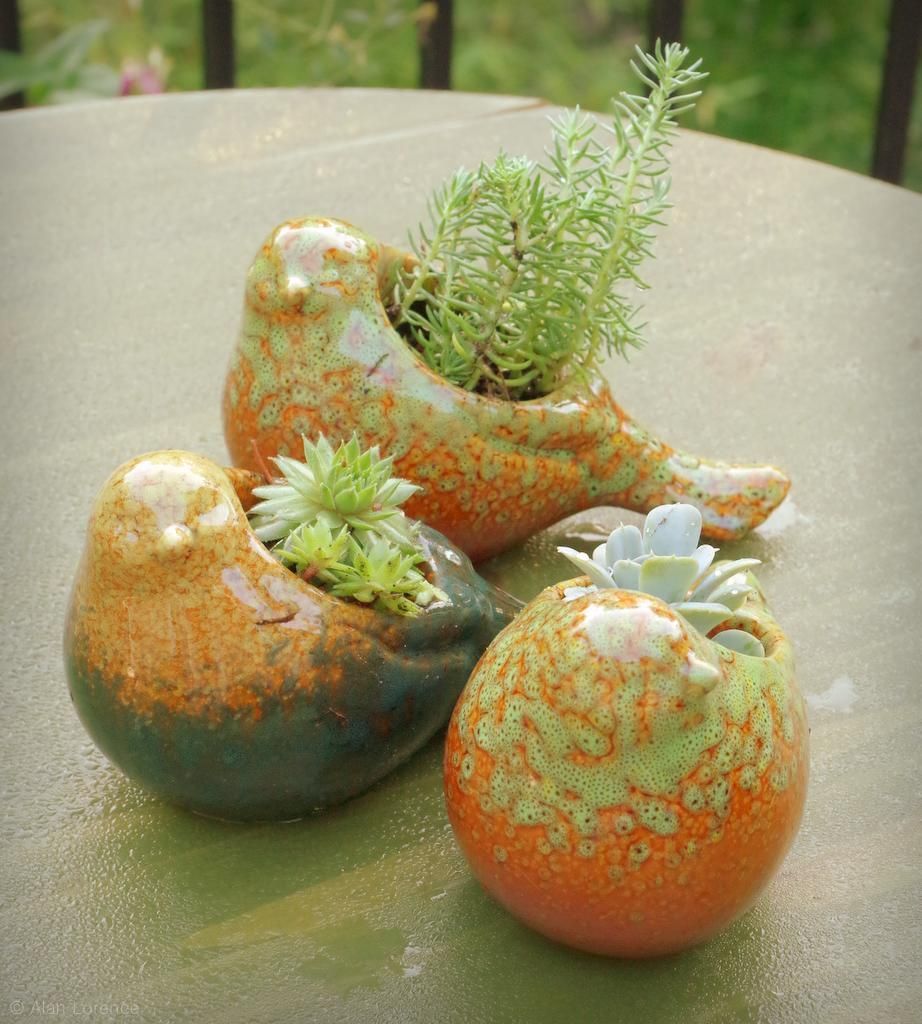
They still don't have too much room for roots, but at least they'll hold plants now.
No replacement for the bigger planter, but it's a start!
.


Delicate job but still managed to do it nicely!
Very sweet little birds, nice job! Never would have thought to use those as planters but they work beautifully. Nice.
They're adorable!
Thanks for the tip
I like your new little flock! Hope you find a new mom to go with them!
I was holding my breath, afraid that wasn't going to end well. Glad to see them all planted up, nice work!
Mark/Gaz: delicate indeed. I'm glad I was ignorant when I started or I might not have attempted it. :)
Tamara: They are cute little things -- I'm wondering now if I should go back and get more...
Maywyn: Thanks!
Peter: I have already found a new mom -- more info soon. :)
Loree: I would have been holding my breath too if I had any idea pieces would start breaking out like that! It was a bit of a surprise!