A new trellis
The first project of the 2014 gardening season is a simple copper pipe trellis, and has been in planning since last year. Remember when I planted a few clematis, then used an underperforming buckthorn shrub as a temporary support for the one vine?

Well, it's time to come up with the permanent solution. Since I've had months to think it over, I was able to come up with a good mix of simplicity (to build), functionality, and beauty in the design.
Here's a look at the area again:

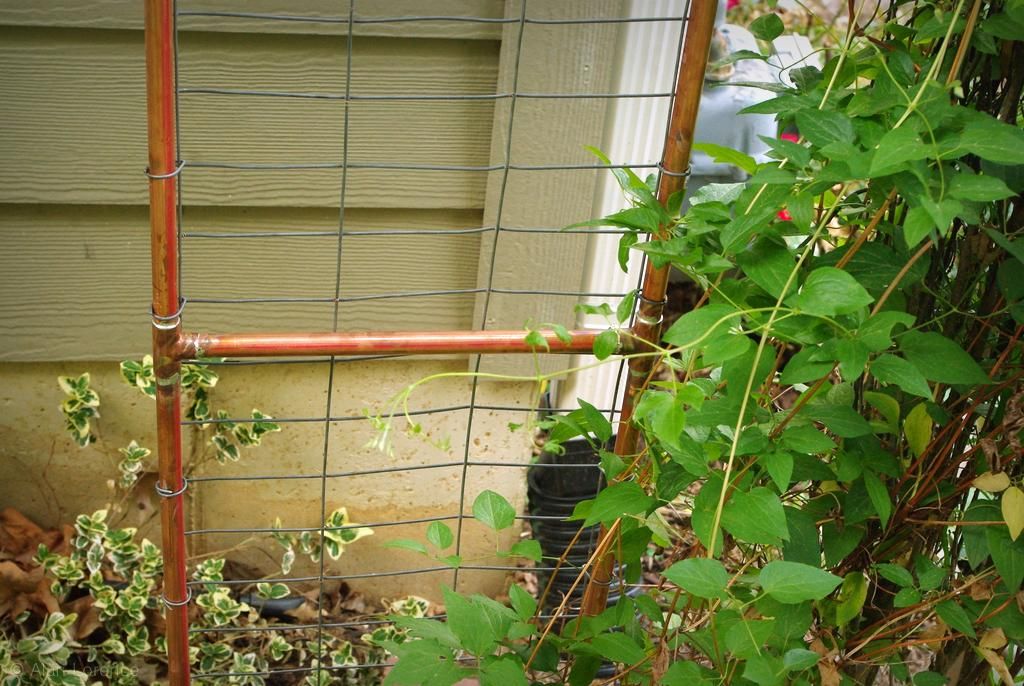
It's the southwest corner of the house and since it faces the street the trellis couldn't be just a column or box of fencing material -- it had to be something more attractive.
So I decided upon copper pipe.

It's easy to work with, not too expensive (since you can use the smallest, thinnest grade -- the parts for this cost $30), and looks fantastic in the garden.
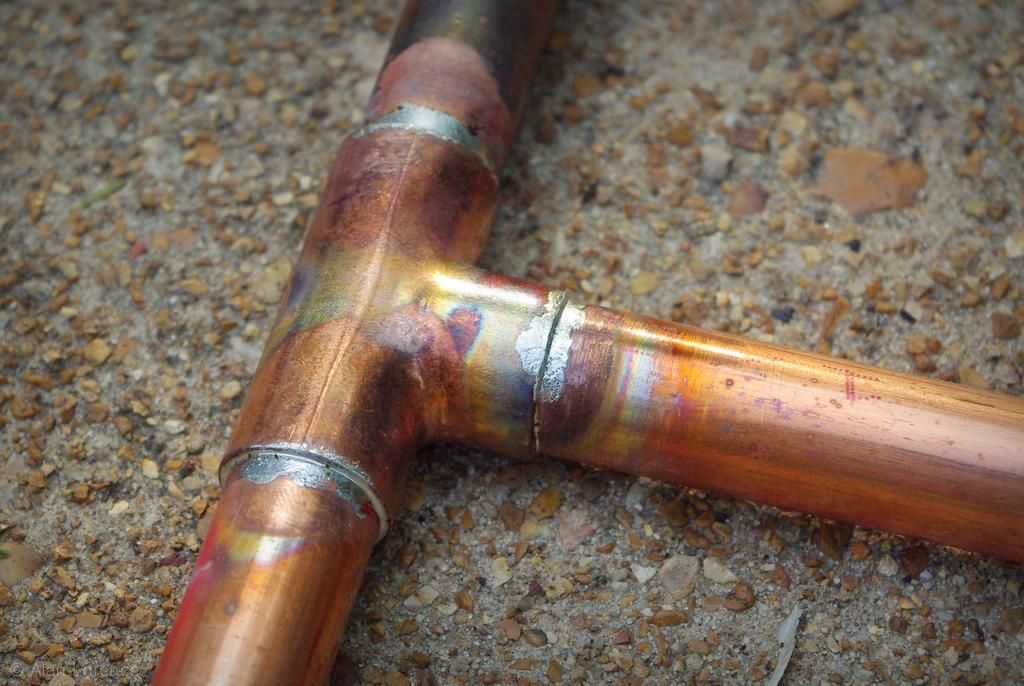
I made it easy on myself and used multiples of feet when measuring: three feet for the legs, two feet between the horizontal supports, and each crossbar is one foot long. There are a couple of ways to cut pipe, but using a hack saw is the most difficult. Do yourself a favor and buy a pipe cutter. You clamp it on the pipe, tighten it a little as you twist it around the pipe, and after three or four turns the pipe falls off. So simple!

I've glued the joints together before but I much prefer soldering them. It seems stronger, you don't have to wait until the glue dries before you can move the piece around, and it turns the copper some really wonderful colors:
With the framework in place I experimented a little with the "netting". I went with my trusty fencing material again and although I cut the first piece too narrow -- there wasn't enough left to wrap around the pipes -- I got it right the second time:
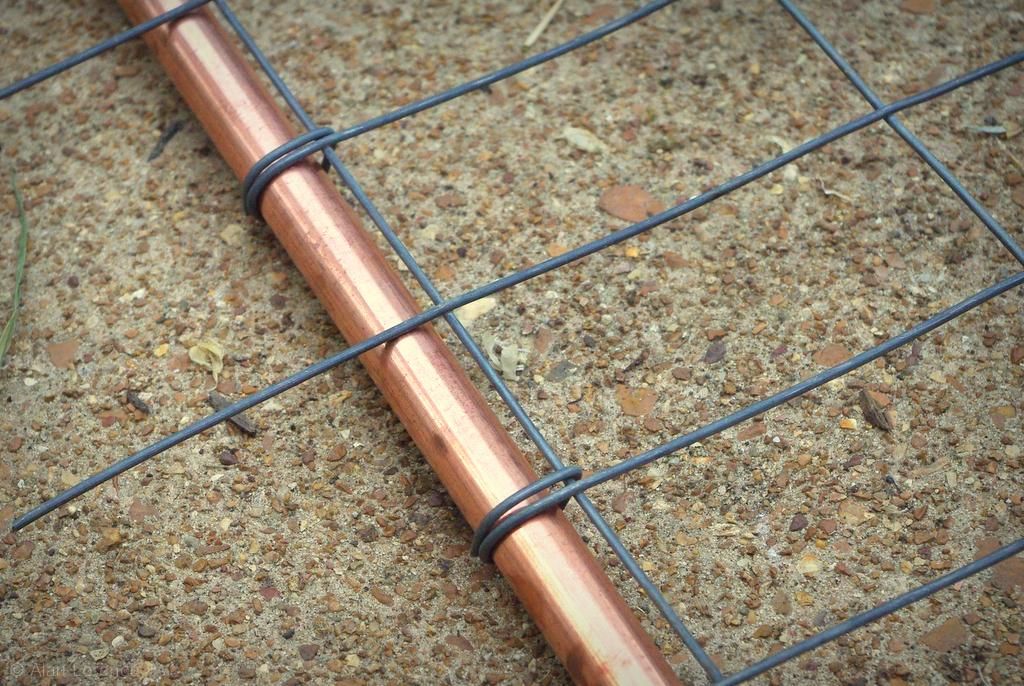
I wrapped the wire by hand, then used pliers to finish off the last little bit -- I didn't want to leave those little ends sticking out everywhere as I knew they'd cause me pain (literally) in the future. I didn't wrap every single wire, so trimmed off the rest.
The brackets that I had in mind to attach the poles to the house, well, I just couldn't find them. I used them when I had a temporary greenhouse a few winters back, and I'm not sure if I saved them after I disassembled that as they were pretty bent up. I suspect they're in the garage somewhere but since it still has "disaster zone" status after the winter storage of plants I wasn't able to do a thorough search.

I'll show the brackets in the next trellis post, because I actually built two of these! (The second one will get finished up and installed this weekend.)

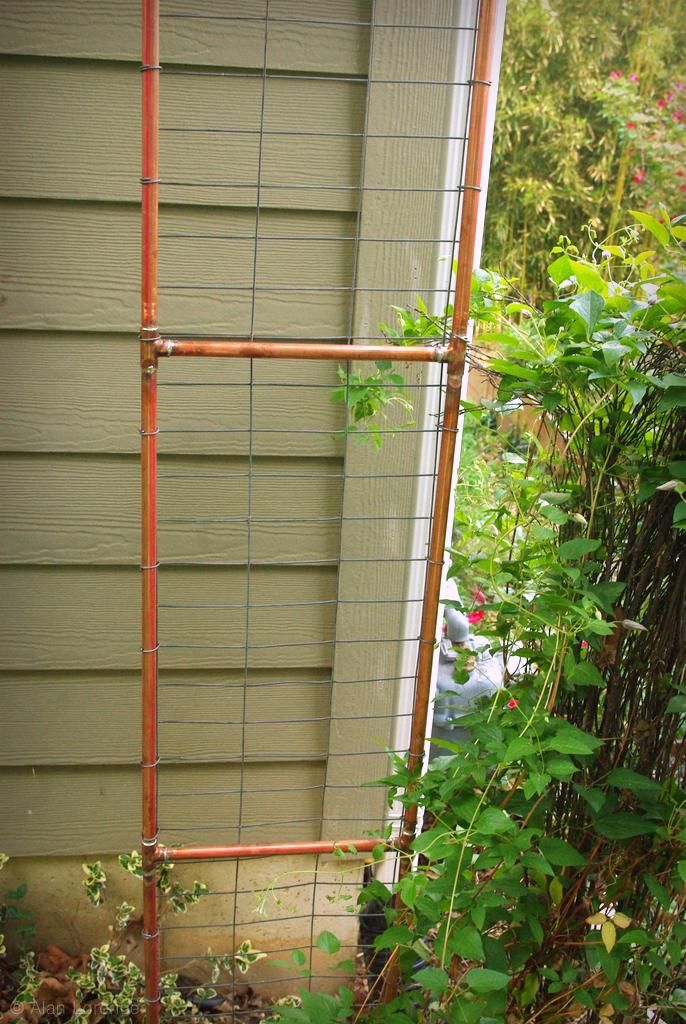
I'm really pleased with the way this turned out, and now that I see it I wonder: why I didn't put a trellis here years ago?
(I'll move the plant to the trellis after I attach the top to the house.)
.


Sometimes it takes awhile to come up with the perfect solution, like what you have now. That looks industrial/contemporary too!
Looks good! Can't wait to see it covered with leafy foliage and lovely clematis flowers.
love the trellis :)
Too bad you're not making these to order because I'd take a couple.
Very nice and simple trellis....you have inspired me to make one of my own, but I'll be using glue....smile.
Awesome! And it appears to be a good year for clematis - mine are growing like crazy!
Thanks everybody! I especially like it because it was relatively easy to make.
Loree: I'll make as many as you want, but I don't deliver. :)
Virginia: I've used Gorilla Glue before and it seems to be holding up quite well (the polyurethane glues that need water to cure).