Putting up the greenhouse
>> Monday, November 22, 2010 –
building,
greenhouse
As I was deciding which chores to do around the yard or house this weekend (clean garage, clean basement, pull vines, paint bookcase were all strong contenders) I took a look at the weather for the week. Good thing I did, because later this week it's going to get cold: 21ºF or so a couple of nights in a row.

That fact immediately moved a lower-ranked task to the top of the list: put up my temporary greenhouse. The greenhouse is where most of my smaller potted bamboos will spend the winter -- maybe I'll put a few other plants in there too if there is room.
Last year was the first for this greenhouse which I designed and constructed out of PVC pipe and plastic sheeting, and I learned a lot from that. My initial design was too tall and not sturdy enough, and essentially dismantled itself in an early windstorm. I redesigned on-the-fly (in the cold, cold wind) and converted it to a flat-topped greenhouse that was sturdy but collected snow and water like crazy.
This year I decided to make a sloped roof design, and incorporated a lot of the strengthening features I added in last year's redesign.
Here's the area that will be used -- notice the wooden foundation frame from last year.
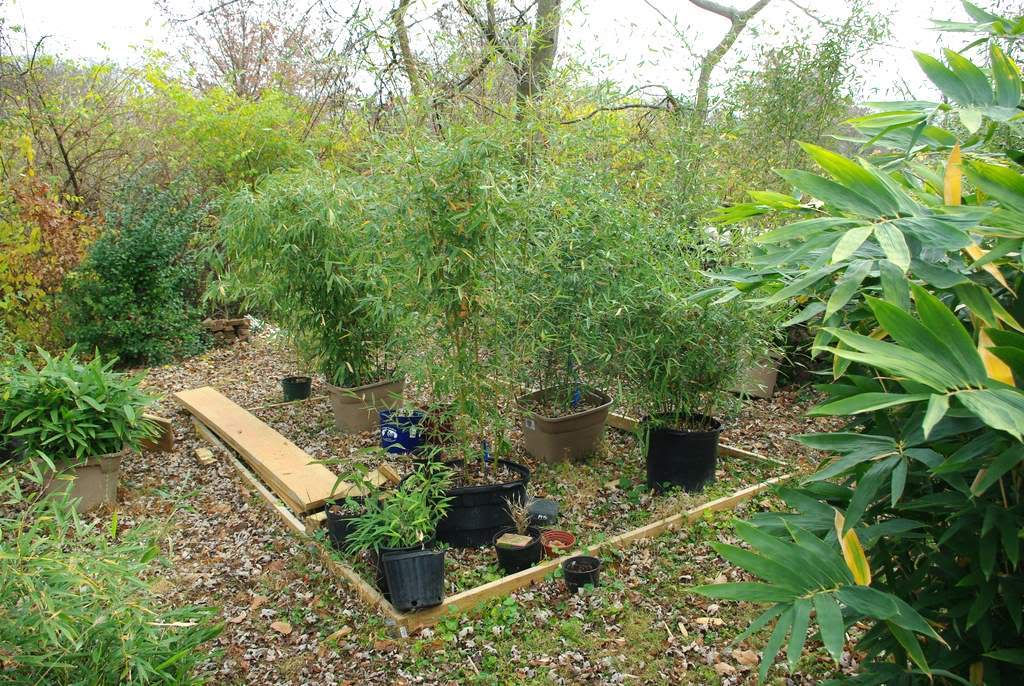
Also notice that there are a lot of bamboos in the area, so the first step is to remove all of those and rake the area:

Next I got all of the PVC parts that were left back here when I dismantled this in the spring:
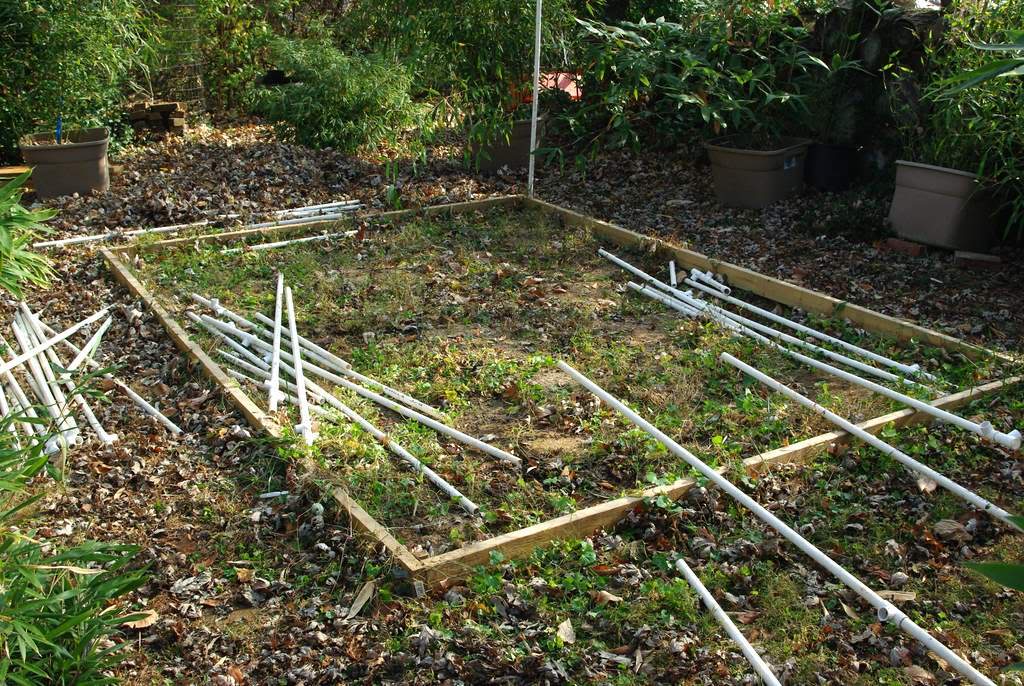
I had labeled all of the parts so I knew where they went, but that didn't really matter because of my redesign this year -- although it was a good starting point.

Several of the brackets had been bent, probably by running into them with the lawn mower wheels:

They had to be bent back into shape with a screwdriver before the posts could be put into them.
I ended up cutting a lot of the pieces to make them shorter:
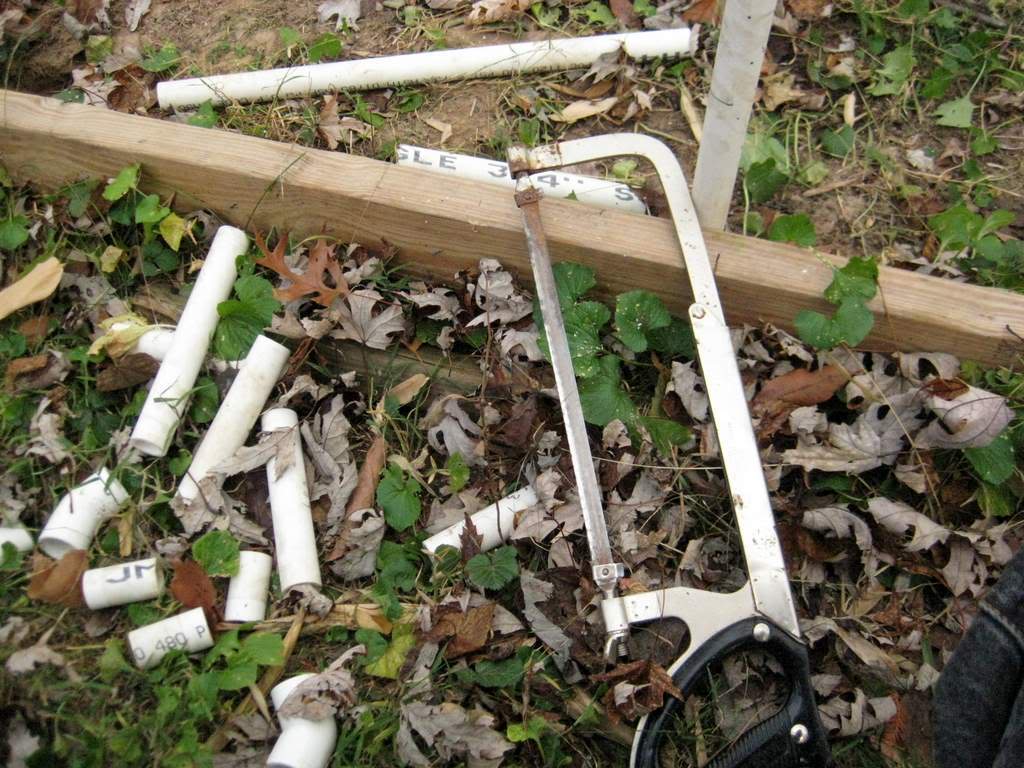
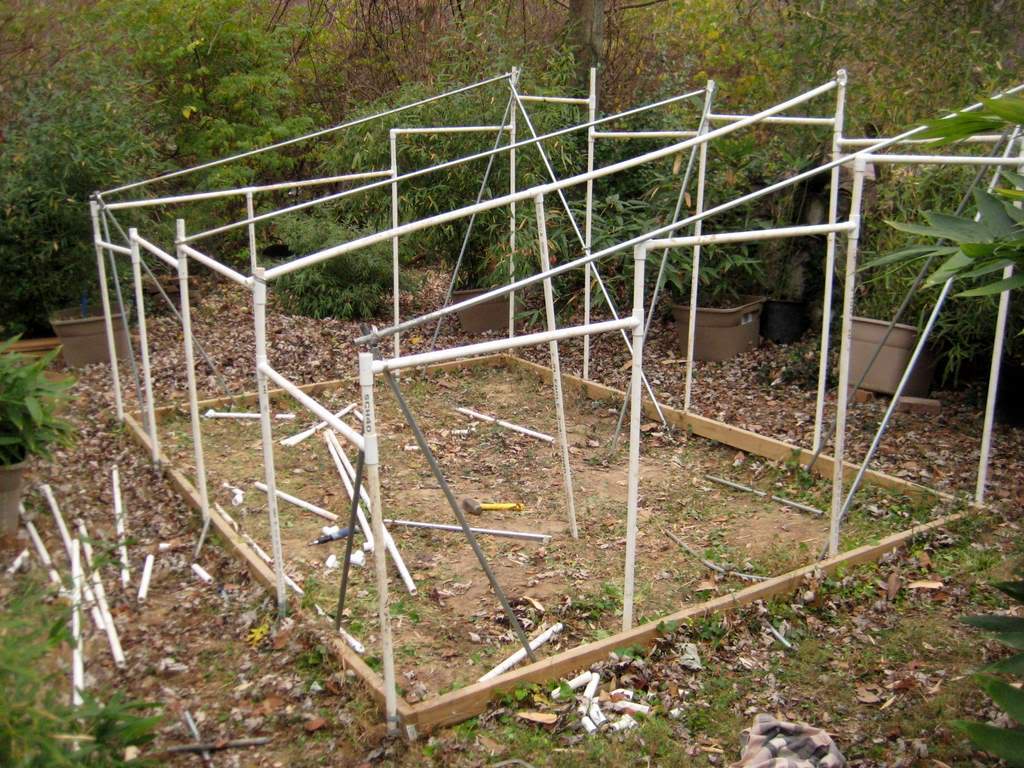
You can see that the structure is starting to take shape now:

I wasn't concerned about cutting the parts for two reasons. First, I have plenty of extra lengths of pipe from the original peaked roof design (that lasted only a few days before falling over). Second, I'm not planning on building this greenhouse again next year, but if I do I'll use this same sloped-roof design anyway. I'll have to remember to relabel these parts when I dismantle it, just in case I do need them again.
Now it's time to strengthen the structure, as the PVC is somewhat wobbly, and adding the "skin" doesn't really tie things together as solidly as I had hope (lesson learned last year). So I'll add lengths of metal electrical conduit to the corners and connect them to the PVC with hose clamps:

I also added the rafters, which are alternating conduit and PVC pipes:
The PVC pipes got a support leg, as they are pretty bendy:

I couldn't push the PVC pipes into the ground, so I pounded a short length of conduit into the hard, dry soil and slid the pipe over the end of it:
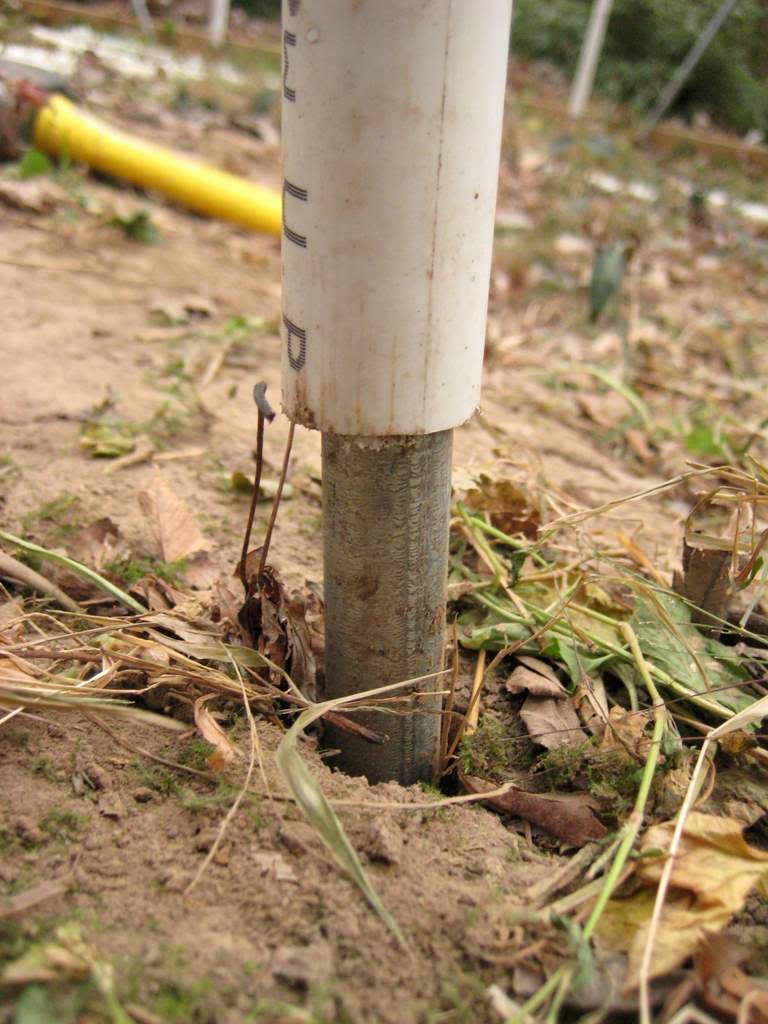
Now they won't slip when I bump into them -- and I will do that at some point during the winter I'm sure.
Next step is to add the plastic sheeting, but before I do that I'll wrap any sharp or pointy parts with some duct tape to stop them from ripping the plastic:
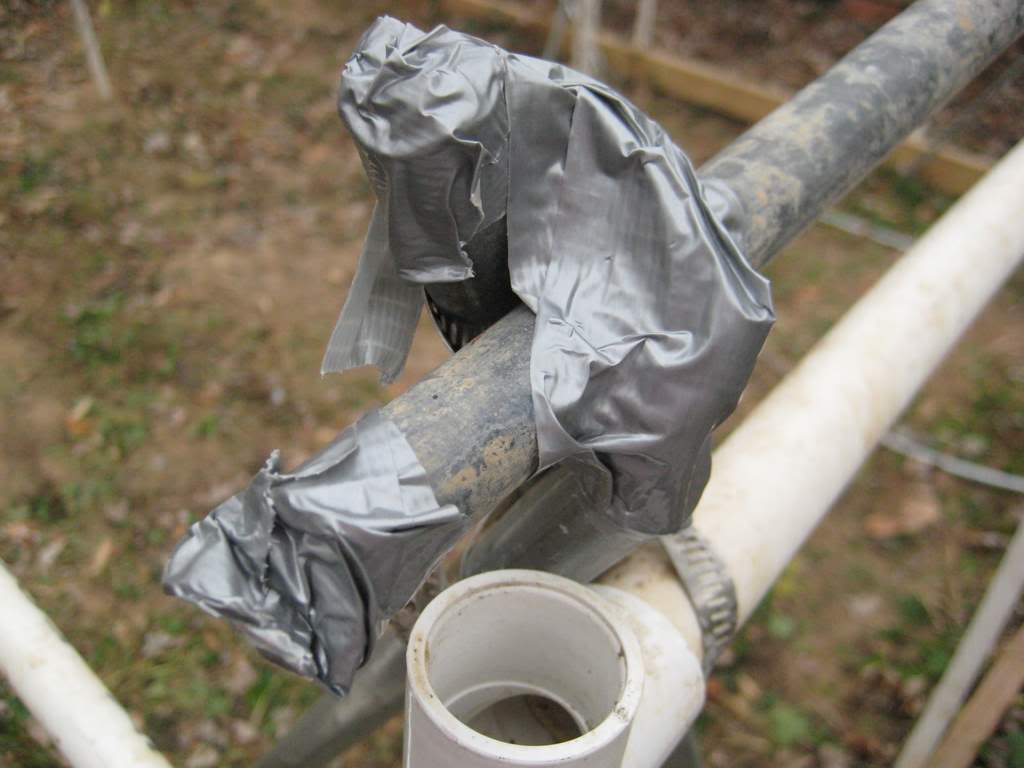
The plastic is pretty sturdy, but I don't want to take any chances. Now the sheeting can go on:

Luckily I folded this in a logical way last year, so it's easy to just pull over the top of the structure.
A bit of unfolding, tightening, sliding, cutting, and clamping, as the sheets are not big enough to cover the entier structure so I need a few different pieces...

...and it's finished! It's not the prettiest structure, but it will get the job done:

I ended up having trouble with the door, which is on the side facing away from the camera. Since I put it in the middle of the wall I couldn't figure out a good way to put a weather-proof flap over it. I wanted to make a flap that I could pull open sideways, then wrap around the corner of the structure for a good seal. I had a similar door last year, but this time the problem was the top edge of this panel -- I either had to leave it loose along the top edge -- which would let too much cold air in I thought, or drape it over the top corner making it very hard to pull the flap back to get inside.
My neighbor who had been helping me at various times during the day gave me the solution: why not just pull the flap up and climb under, instead of pulling the flap sideways? Perfect solution! (I do have some concerns about how dry I'll stay doing that when the inside of the greenhouse is dripping with condensation, but we'll see how it goes.
There's plenty of room inside, and although the headroom is limited, I'll be putting only my shortest plants in here anyway so it will be fine. It's always exciting walking into a newly-created indoor space where there was previously just the outdoors (like when setting up a tent). Soon "space" will not be the correct word to use here, as it will be jammed with plants.
I have a couple of more details to finish like putting screws into all of the PVC clamps so they don't spring off when the winds hit (another lesson learned last year), and seeing if I can keep the roof flaps from blowing open too much, but I'll take care of that over the next couple of days.
Then it's time to move the plants inside. There will be fewer really large pots than last year, so this should be a relatively fun task. I love watching the space fill with green!


Do you use any form of heating at all?
I have a paraffin heater that is enough to raise the temperature 5-7F warmer than the GH would be, and even with a natural differential of 15F from outside temps, that won't be enough if we get well below 0F with no cloud cover.
I'm planning on using my 300 watt aquarium heater that is getting used for my compost tea project in one of my greenhouse 55 gallon water barrels if there is any chance of the barrels freezing which never happened last year. It is supposed to heat a 100 gallon barrel up to like 89F at full power so I might probably only need to turn the power half way up.
Anyways that's a very good set up how there's so much floor space and sturdiness. I might make one of those if I need another greenhouse. How much did the materials to make it cost?
No heating at all, except for a 32 gallon (I think) garbage can filled with water. It may seem like a lot of space, but it fills up quickly. As for cost, I can't remember exactly, but it really wasn't cheaper than buying a cheap kit -- I think it was between $100 and $140 total.
That sounds like a good price especially for its sturdiness. Mine was a cheap kit at under $90 with shipping included on an ebay bid, but it requires a lot of extra support to take high winds and the expected snow load. The weak aluminum pipes still broke and had to get re-enforced last winter.
If I ever need another greenhouse, making my own with pvc pipes sounds a lot better.
PVC alone wasn't sturdy enough (too much flex), which is why I added the conduit poles and hose clamps.