Digging Bamboo Rhizomes
>> Sunday, March 7, 2010 –
bamboo rhizomes,
bamboo shoots
After I partially emptied the greenhouse, I took a walk around to inspect my other bamboos. This is not unusual -- I do it quite often -- but after seeing all the nice, fresh green of the protected bamboo, I wanted to see what our colder-than-normal winter did to the in-ground plants. When I got to the 'Spectabilis' (Phyllostachys aureosulcata f. Spectabilis):

I saw the couple of rhizomes that had escaped their designated area, and remembered that I should dig them out before shooting starts (sometime in the next few weeks). So although I wasn't planning on doing it now, it seemed like I should just jump in and tackle it while the weather was nice.
***
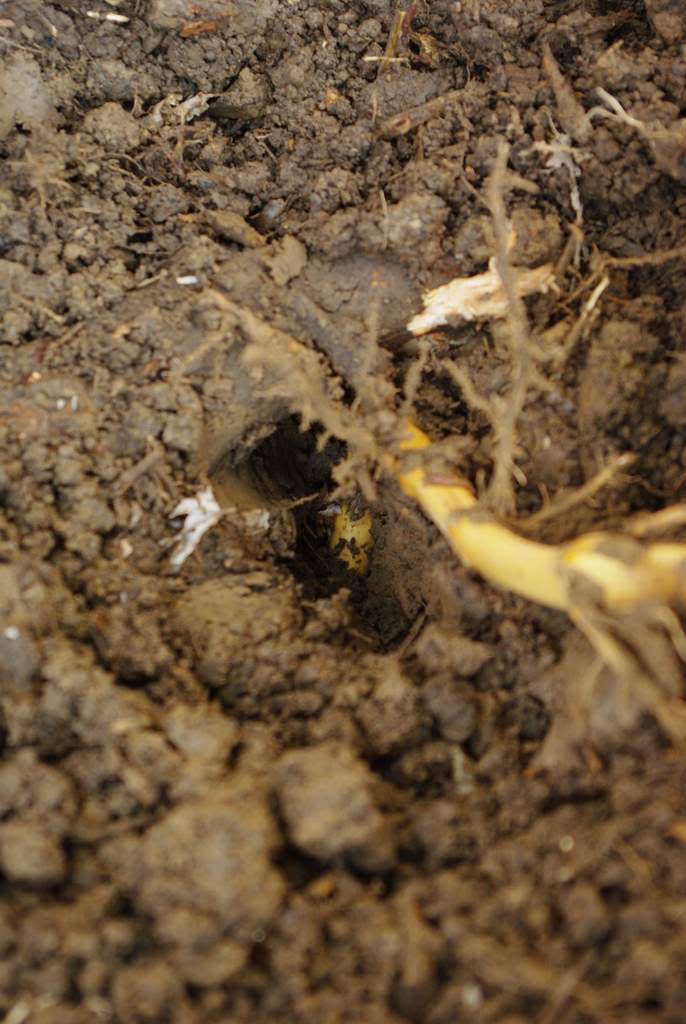
There are three rhizomes showing here -- they look like green or yellow sticks arcing out of the ground:

Although this is a raised bed and has a mulch-filled trench around it to help me find the escaping rhizomes, there is a wild cherry tree (seen at the right of the first photo above) nearby, and a couple of its big roots are in the way. The rhizomes exploited that weakness in my defense and escaped. That's cool though, because it allows me to dig these rhizomes, pot them up, and get a few new plants out of it!
I started by using my digging fork to loosen the soil around the rhizome:

Then when it was loose enough to pull, I yanked it out. This is actually the first time I've done this without throwing away the rhizome, so I was being careful not to damage it at first, but after a few minutes of work I realized there was no reason to be gentle. A few minutes of yanking and a cut (with hand pruners or loppers) and I had it free. I then repeated the process for the other two rhizomes, and found another one that hadn't broken the surface. One of the tree roots had deflected the rhizome downward, and luckily I found it.
Here you can see the easy rhizome (coming up from under the tree root), the tree root, and the rhizome that went downward.
After hauling the rhizomes back to the driveway, I removed the heavy clay soil by soaking them in a tub of water for a couple minutes, then using medium water pressure to remove the rest. I did this all in the tub to keep the mud from getting all over the driveway. (Only trouble with this was I didn't think about how heavy the tub would be 1/2 filled with mud, and filled the rest of the way with water. My dolly wasn't handy, so I had to bail out most of the water then drag the tub to a location that could handle a dumped tub full of goopy mud.)

Taking a closer look, you can see that the shoots are starting to form:

Really quite beautiful, aren't they?

Actually, I've just realized that I should have added some bagged topsoil to the mix to give it a little more weight -- that's what I ususally do when potting bamboos. I guess I'm a little rusty, since this is the first potting of the season.
I don't have photos of the potted rhizomes because they're not much to look at. Once they send out some shoots I'll snap away and post an update.
How much time did it take? It took about 2 hours including cleanup to dig and pot these rhizomes.
.


